My Holiday Mantel on DIY’s Made + Remade

diy-maderemade-mantle

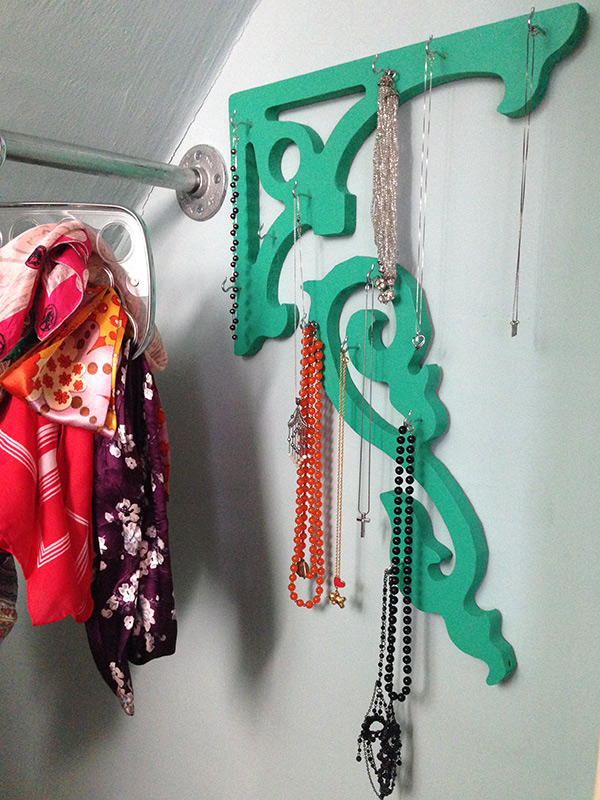
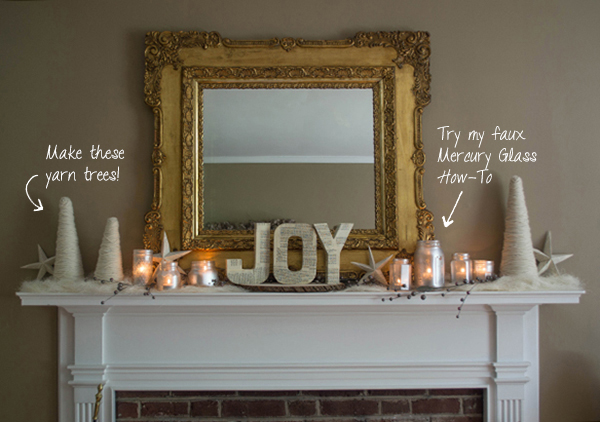
This week on DIY’s Made + Remade, we debuted our latest Blogger Challenge. Inspired by the upcoming holiday season, five bloggers partnered with JoAnn to create a holiday mantel. The one I created is a wintry white with a vintage vibe that I have to admit is a lot more more neutral (read: elegant) than my normal red & green kitschy ornaments we’ll bust out in December. Take a look at all 3 of my posts:

(Tips for Achieving my) Wintry Mantel with Vintage Style

Make Yarn Trees for Modern Winter Decor

Repurpose Old Jars into Holiday Decor

diy-blogger-challenge-mantels

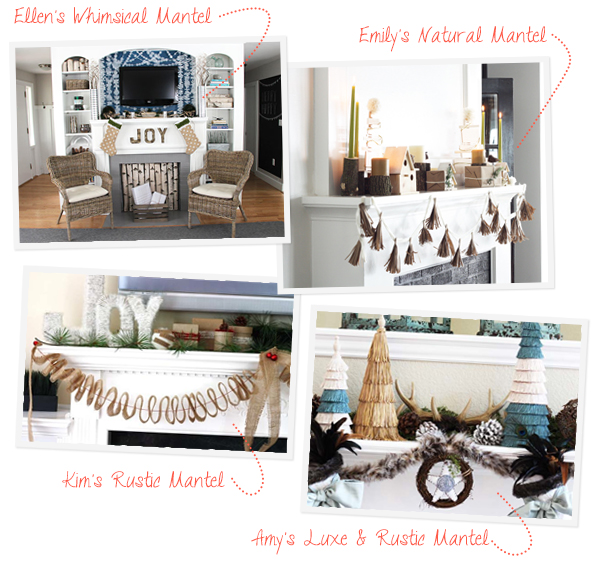
Then, check out the other mantels! There are some serious Pinterest-worthy projects.

Ellen’s Whimsical Mantel With Natural and Coastal Touches
(Love her Birch Log Fireplace Screen!)

Emily’s Natural and Sophisticated Mantel

Kim’s Rustic Winter Wonderland Christmas Mantel
(Love her DIY Cabin Snow Globe!)

Amy’s Luxe and Rustic Christmas Mantel

Which one is your favorite?

Make My New Necklace Hanger

necklace-hanger

A couple weeks ago, Husband redid my closet (because he’s the best), and I decided that if my clothes were getting a stylish new home, my jewelry should too. So I went to Lowe’s–not quite sure what I was looking for. I ended up finding these beautiful pre-cut corbels in the aisle with the banisters and trim so I nabbed ’em!

Here are the other supplies:

  • a bit of paint & a brush
  • drill
  • screw hooks
  • set of picture hangers
  • hammer

01-necklace-supplies

I also got a sample of Pantone paint and applied two coats.

02-necklace-paint

Next, I drilled holes for the hooks.

Note: Be sure that your drill bit is set short enough that it won’t go all the way through the wood. Husband helped me with this part, and I was pretty excited to conquer some serious fear of the drill.

03-necklace-drill

Next, grab the hammer. Before you attach the picture hangers to the back, be sure you’re working on a soft surface. You don’t want to scratch up your paint job.

04-necklace-hanger

Then, just screw in your screw hooks, and hang it up.

05-necklace-hooks

If you have an old house like we do, you live in constant fear of the plaster cracking.

Here’s a little tip (again thanks to Husband): Place a piece of painter’s tape over on the spot before you start hammering in your nail. Then, just pull it off before you hang things up.

06-necklace-tip

Now there’s nothing left to do but hang up your necklaces.

07-necklace-hang


The Latest Big Project or… Why I Really Like My Job

Over the past year, I’ve gotten to be a part of 3 specific projects at work that made me go, “Really? You’re going to pay me to do that? Awesome.” You can find #1 here and #2 here. (#2 just won an award that got the whole office really stoked.) While, I usually don’t talk about my day-job, this third project gives me the unique opportunity to share it with you because… I’m blogging on this crazy, cool new blog on DIYNetwork.com, and you’re seriously going to love it!

DIY Made + Remade

The cool thing about working for Scripps is that it’s a really encouraging environment for creatives. We all really like to make things. We’re curious about how things work. We find beauty in the process, we love collaborating, and we really like trading secrets. That’s what Made+Remade is all about. There are several bloggers from inside the office and several others from all over the country, but the underlying factor is that we all really love living the DIY lifestyle.

So, pardon the commercial, but if that sounds like something you’re into as well, hop on over and look around. (I’ve put a link in the right sidebar to make it easy to remember.) My first post is all about finding and caring for vintage costume jewelry, and I’ve got a couple more in the works. I’d love to know if you have any ideas for posts. Is there a question you question you want answered? Something you’d like to fix or a project you’re dying to try? Shoot me an email or comment below!

What sorts of things do you want to DIY?

Our Christmas Gallery Wall

picture collage display close-up

Confession: We bought our 1st house 6 years ago and, until recently, had virtually nothing hanging on the walls. I don’t know why. I love interior design, but when it comes to our own home, it’s been so much harder to get things done. I think it’s the perfectionist in me that is nervous things won’t turn out perfectly. But recently I made a goal to stop putting things off. So this weekend, I bit the bullet and put up the frames that had been sitting on my desk for over a year. I still haven’t decided just what photos to put in them (we hardly ever print any out) so in the meantime, I’ve made this Christmas gallery wall. It turned out to be a lot easier than I’d expected.

framing

Step 1: I cut a piece of butcher paper to the size of the space where I wanted to hang the pictures.

Step 2: I laid out all the frames out in a random way and moved them around until they were just right. Then, I used a ruler to make sure things lined up correctly.

*Tip: Get 2 different sizes of frames to mix it up a bit. I had 6 5×7 frames and 8 4×6 frames. 

Step 3: I traced the frames onto the butcher paper and then made a dot 1/4 inch into the box where the nail would need to be.

Step 4: Hang the butcher paper in place with masking or painter’s tape. Then, place the nails where you put the dots. After that, you can just gently remove the paper and leave the nails behind.

scraps collage frame

Step 5: I gathered a bunch of Christmas-y images from magazines, cards, wrapping paper, and old books. Then, I cut them to size using the glass of the frame and the XActo. I used a single image for some and for a few I made collages.

Step 6: Finally, I put the frames back together with the artwork inside and hung them on the wall.

picture collage display

What do you think? Do you ever hang seasonal artwork in your home?

DIY’s Great Wreath Rivalry

Alright readers, it’s competition time! Recently, I had the unique opportunity of doing a couple How-To’s for DIYNetwork.com’s Great Wreath Rivalry. Now, by simply *pinning* one of the 12 How-To’s on the site, you can be entered to win COLD HARD CASH.

Click Here to Start Pinning Wreaths. 

If you just want to see my How-To’s:

(This one is not part of the comp but still super cute.)

Click here to see how to make my wreath with vintage children’s book illustrations.

and then…

(This one you should pin… lots.)

Click here to get the super simple instructions for this card display wreath.

An Easy Garland How-To

As I mentioned on Friday, every house should have a handmade garland this time of year when we are all forced to spend a bit more time indoors. It just makes walking in the door on those chilly, dreary days a bit more festive. So I thought I would share the one that I made for our home this week. It’s hanging in our living room and, I must admit, I want one there all the time now.

What You’ll Need…
– I am 100% obsessed with my Martha Stewart circle cutter and love finding any excuse to use it. (However, scissors with a traced, round object would also work but may take a little longer.)
– Scissors
– Bone Folder
– Decorative Paper or Wrapping Paper
– Glue Stick
– Yarn

1.) Measure the space where you’d like to hang the garland and cut a length of yarn accordingly.

2.) Cut out circles. I used 4 inch circles and cut out about 40. I ended up having some extra, but I’m the type that would always rather have too many rather than going back to cut out more.

folding circles

3.) Fold your circles in half, and use a bone folder to make a smooth crease.

Add glue and yarn in crease

4.) Put glue on one half of the circle and lay your yarn right in the crease.

fold paper over yarn and itself

5.) Fold the circle over the yarn on to itself. Use a bone folder to smooth out any wrinkles.

hanging garland, flower

6.) When the garland is done, you may want to make something that will cover the place where you attach the garland to the wall. In this case, I made a few flowers out of that craft paper with slits that many places use as a shipping material now.

Hang and voila!