This morning I am super excited to introduce you to my best friend, Matt. Not only did he decorate a cubicle junior year like a boss and sing all the words to every Disney movie made between 1987 & 1995 with me while we were in college, he also happens to be one of the craftiest people you will ever meet in real life. So, needless to say, I was super excited when he called to tell me about this How-To he’d put together for us. It is a super cute project that can translate any time of year. So without further ado, meet Bestie Matt…
Fewer things go together like southern belles and mason jars. But southern belles and mason jars *covered in glitter* would be a match made in the Heaven all southern belle’s hair strives to reach. When I was brainstorming for an idea, I thought, “What is more southern than a mason jar?” The next question was, “How do I ensure my front door doesn’t look like a recycling bin?” Welcome glitter to the situation.
What You’ll Need:
Jar Lids
Glitter
Glue
Drill or Metal Punch
Office Brad
Hot Glue Gun
Ribbon
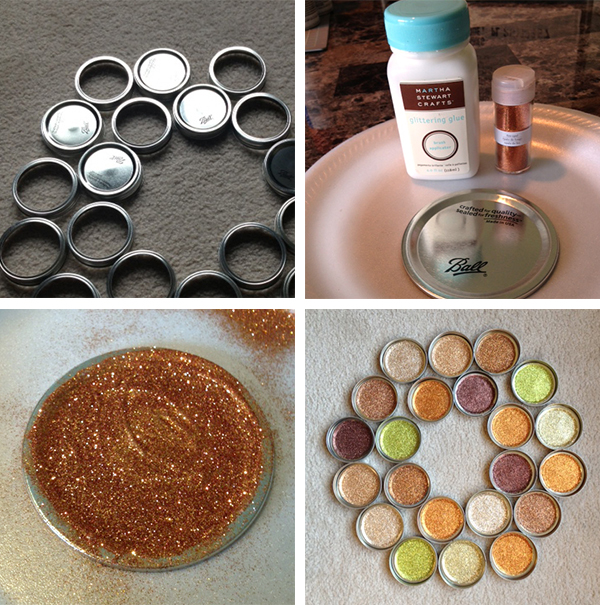
The first step was to lay out how I wanted the wreath to look. This should be a close approximation. I ended up using a few less lids than I originally thought as I began connecting the lids together.
Next, select the colors of glitter that you want to use. I chose colors of fall. I glittered a few of each color.
Next, I laid out the colors in a pattern that I liked. Once you lay them out, mark each one with a black dot where the connection point between the lids will be.
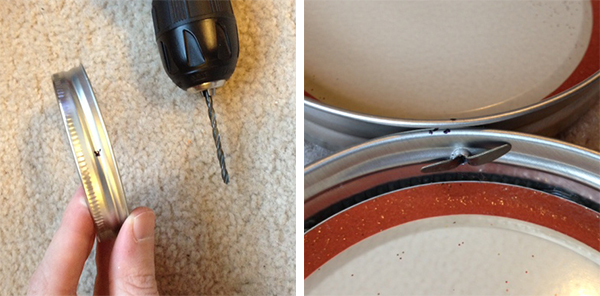
Either using a drill or a metal punch, make a hole in the lid where the connection will be made. After the hole is created, place the insert back into the rim of the lid. I used a dab of hot glue to hold it together.
Using an office brad, connect the two together. To ensure a tight connection, put some hot glue on the open end of the brad. The more connections you make, the more sturdy the wreath will be.
The last touch is to add a bow to the front and you have a festive and southern touch to your decor!


