Category Archives: Uncategorized
Snapshots of NYC
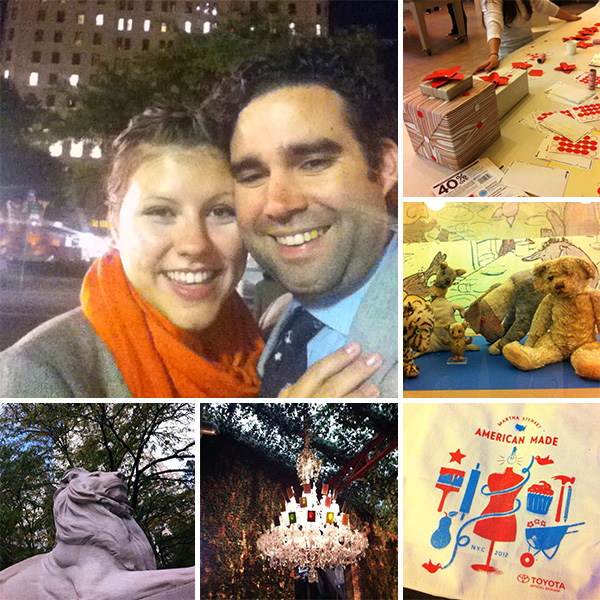
So far this quick trip to NYC has included:
– A visit to The New York Public Library… of note: Lunch Hour NYC and seeing the original Winnie-the-Pooh (I always have to pay him a visit.)
– Martha Stewart’s American Made event in Grand Central Terminal
– Ari Meisel’s talk at Grind: The Art of Less Doing
– The Century of the Child at MOMA
– Lots of wandering around the city with my honey.
– – – – – – – – –
One more day in the city, and I’m topping it off tonight with a book release party for Debra Shriver that is sure to be swoon-worthy. If you don’t already, follow me on Twitter and Instagram to see Live tweets from the event!
Southern Living Takes It to the Tailgate
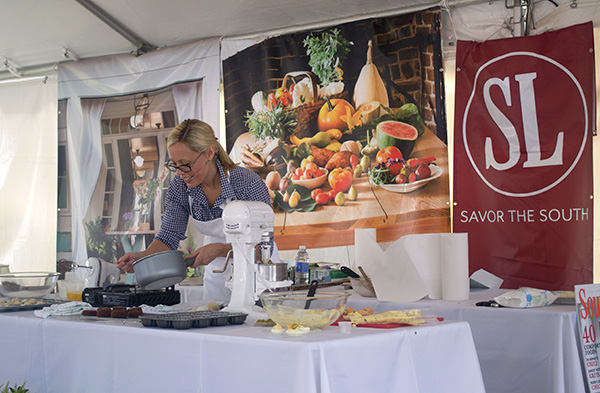
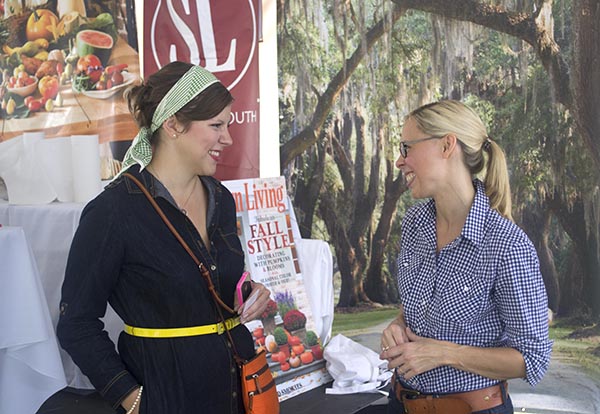
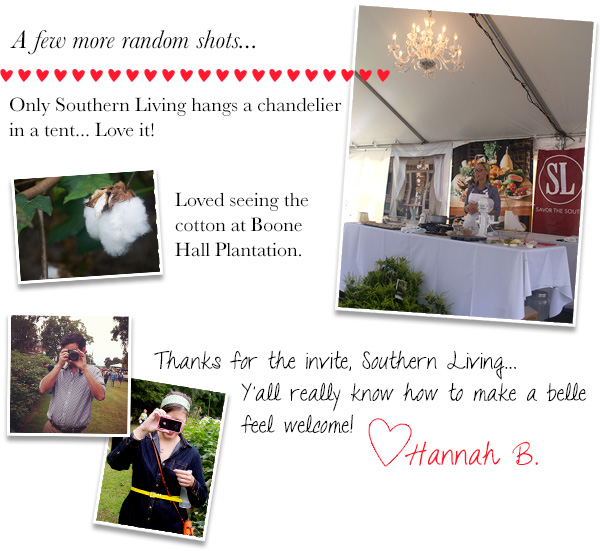
A few weeks ago when Husband and I visited Middleton Place, we also had the opportunity to attend The Southern Living Taste of Charleston event to top off our weekend. Southern Living was nice enough to invite us, and when I saw that they were doing a special demonstration for the new Official SEC Tailgating Cookbook, I knew we had to attend.
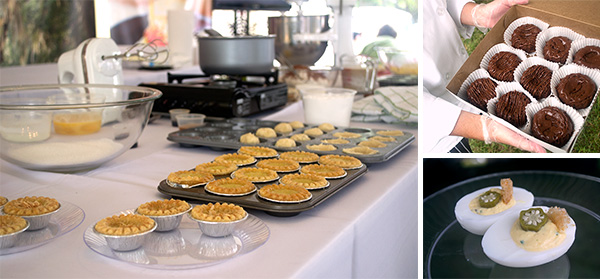
Football is like a religion of sorts here in the South and, regardless of my personal interest in the sport, tailgating is an art form that most Southern Belles need to learn early. From decking out your tailgating space to preparing food that will still look tasty 3 hours after you arrive is really something. Luckily, this book is full of really great recipes… as if we ever expect anything less from Southern Living, right? A few that we got to try at the event: Buttermilk Chess Tarts, Deviled Eggs (a particular hit with Husband), and these amazing little Mini Bourbon-and-Cola Bundt Cakes…
The unexpected treat of the day? Meeting Southern Living Test Kitchen director Rebecca Gordon, an Alabama girl who was cute as a peach! In fact, she even has a tailgating blog, Tidefan Fare, where she shares stories, recipes, as well as a few Q&As with SEC heroes. (For Tennessee fans like us, here are a couple Tennessee parents you may be interested in: this Q&A with Barbara Dooley or this one with Archie Manning.)
I couldn’t post about the book without giving you a little sample of the goodness, so I asked if I could share a recipe. This one was an obvious choice; what belle doesn’t need a little more bourbon in her dessert library? Enjoy!
Mini Bourbon-and-Cola Bundt Cakes
Makes 3 dozen
Ingredients
- 1 1/2 cups butter, softened
- 2 1/2 cups sugar
- 3 large eggs
- 1 1/2 teaspoons vanilla extract
- 1 cup cola soft drink
- 3/4 cup buttermilk
- 1/2 cup bourbon
- 3 cups all-purpose flour
- 1/2 cup unsweetened cocoa
- 1 1/2 teaspoons baking soda
- 1/2 teaspoon salt
- Bourbon-and-Cola Glaze (Recipe below…)
- 1. Preheat oven to 350°. Beat butter at medium speed with an electric mixer until creamy. Gradually add sugar; beat until blended. Add eggs and vanilla; beat at low speed until blended.
- 2. Stir together cola, buttermilk, and bourbon in a small bowl. Combine flour and next 3 ingredients in another bowl. Add flour mixture to butter mixture alternately with cola mixture, beginning and ending with flour mixture. Beat at low speed just until blended after each addition, stopping to scrape bowl as needed. Pour batter into 3 lightly greased 12-cup Bundt brownie pans, filling each three-fourths full.
- 3. Bake at 350° for 12 to 15 minutes or until a wooden pick inserted in center comes out clean. Cool in pan on a wire rack 10 minutes. Remove from pans to wire racks, and cool 30 minutes. Drizzle warm Bourbon-and-Cola Glaze over cakes.
- Go Big: Batter can be poured into 1 greased and floured 15-cup Bundt pan. Bake at 350° for 45 to 50 minutes or until a wooden pick inserted in center comes out clean.
Bourbon-and-Cola Glaze
- 1/4 cup butter
- 3 tablespoons cola soft drink
- 2 1/2 tablespoons unsweetened cocoa
- 1 tablespoon bourbon
- 2 cups plus 2 Tbsp. powdered sugar
The Inn at Middleton Place in Charleston, SC
A few weeks ago, just as the leaves were starting to hint that Autumn was finally arriving, Husband and I drove down to one of our very favorite Southern destinations: Charleston, South Carolina. Usually we spend the bulk of our trip eating & drinking our way around the city, going in and out of shops in historic downtown, and laying out on Folly Beach. But this time, we decided to visit some of the old plantations, and one in particular had an inn that looked like it might be right up our alley… Boy, were we right!
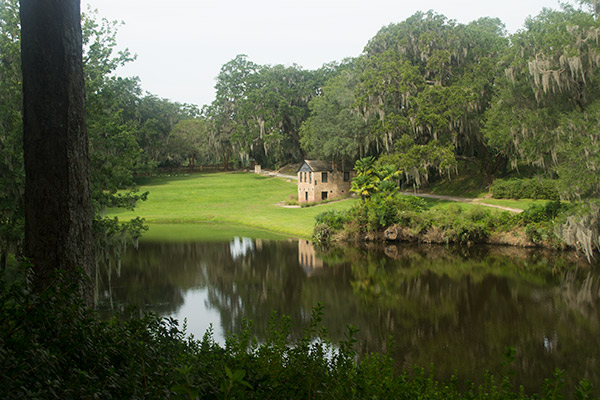
Middleton Place is home to the oldest landscaped gardens in America. It was acquired by Henry Middleton in 1741 and restored by the family at the turn of the 20th century. As a designer, it was fascinating to actually see the historical progression of the design: first geometric (modeled after the gardens at Versailles) and the subtly transitioning into the Romantic period with more winding walkways and shorelines.
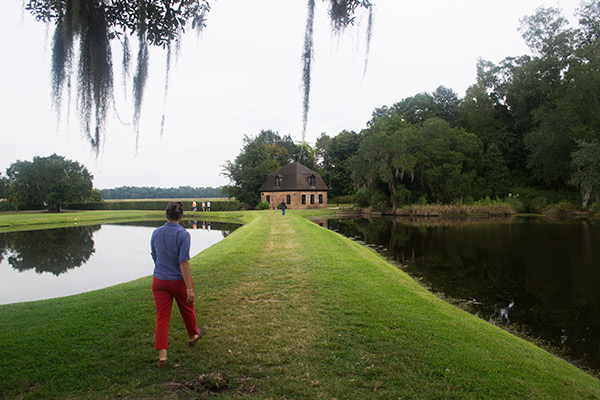
Here are a few snapshots from our wanderings…
We were both amazed at how much wildlife surrounded us as we made our way around the property. There were beautiful peacocks, cranes, & guinea hens, sheep, lizards & frogs, and, of course, beautiful butterflies darting in and out of the bushes near the butterfly lakes.
Above, you can see all that is left of the original home and below, you see the view from that house’s front steps. Many guests and businessmen would come by boat along the river and walk up the terraced lawn to that very path.
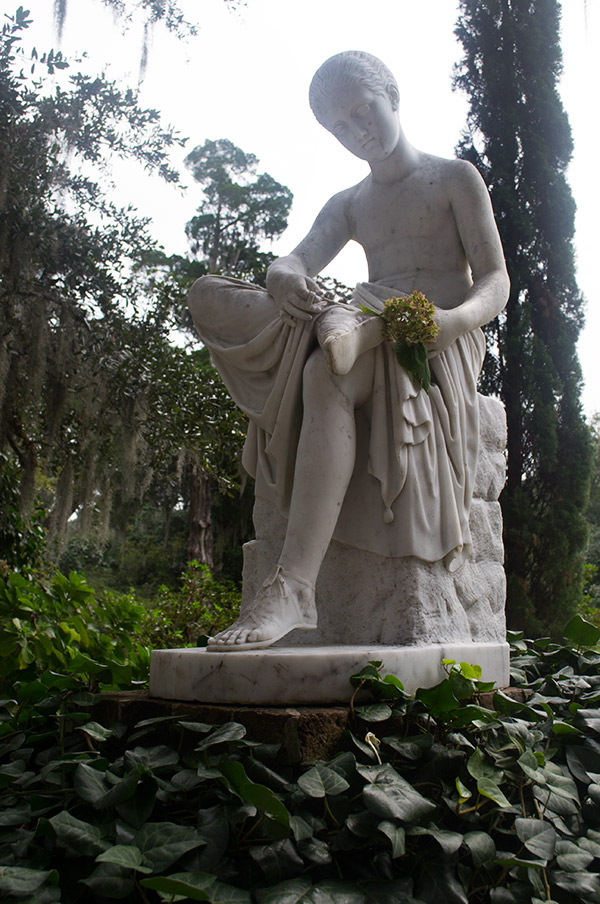
This last statue was particularly interesting to me. The “Wood Nymph” is something of an icon for the house. She’s one of the only statues and works of art that survived the American Revolution and Civil War. In fact, we heard that she was actually buried during the Civil War so that the Union troops, who looted the house, wouldn’t steal her away. She’s sort of magical, don’t you think?
Now let me tell you a little bit about the inn…
We arrived late Friday evening and were immediately enchanted. As you turn off the main road, the Spanish moss hanging from the trees and the lights guiding you into the plantation make you want to be as still and as quiet as possible. The design of the buildings has a bit of Asian influence; clean purposeful lines allow you to get as much out of the beautiful surroundings as possible without interfering too much with the natural world. In our room there was a wall of windows looking out on the Ashley river, a fireplace, and a great big tub complete with a Charleston soak… perfect for drinking champagne and reading the latest issue of Garden & Gun.
We were both amazed at the attention to detail; everything we needed was right at our fingertips. While we chose to spend a lazy Saturday morning reading the paper, sipping coffee, and watching the little lizards change colors as they darted from one thing to another, we could just as easily have taken out a kayak or gone for a swim. It was all right there. One small note: I would recommend going in to Charleston proper to for lunch and dinner… the food was the only thing that failed to blow us away on the property. Other than that, it was an absolutely dreamy weekend, and I can assure, we will be returning to The Inn at Middleton Place very soon! Might I suggest you do the same?
Recipe: Chili & Cornbread
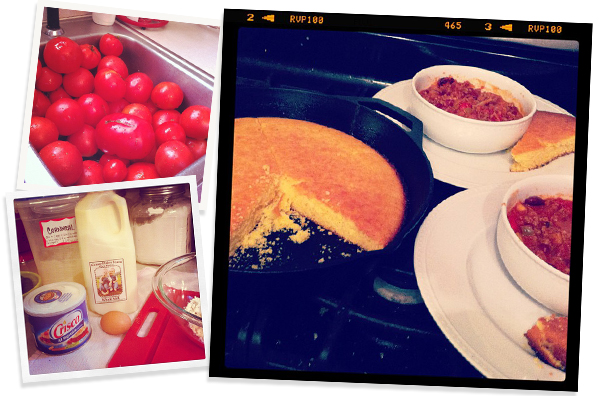
Well, I promised to share my favorite ‘Last of the Tomatoes’ recipe and here it is: Chili & Cornbread. It’s the best for the last of the tomatoes for 2 reasons. First, by the end of the season, the tomatoes are no longer at their peak flavor so cooking really brings out their best. Second, it’s Fall! There’s a nip in the air, why wouldn’t you want chili & cornbread?
Chili is also a really handy thing to have in your cooking repertoire simply because it is easy to have simmering on the stove on Saturday or Sunday when you want to clean out the produce drawers. You can pretty much throw any number of veggies into chili, and they will taste awesome as long as you have the basic seasonings in there. Here’s my basic recipe…
Hannah B’s Basic Chili
Ingredients:
1lb. Ground Beef
1 Onion (medium in size; yellow, white, red, it doesn’t matter.)
2 Bell Peppers (For this particular pot I had green, yellow, & red leftover halves from another dish… sometimes I just use green. Each color you choose will affect your flavor but, again, you really can’t go wrong.)
2-3 Jalapenos or Poblano Peppers (Basically just a pepper to give it a rounder little kick.)
Tomatoes (Whatever you’ve got, chop them up and throw ’em in. If I am buying fresh tomatoes from the market to use, I’ll usually buy 5 or 6. Throwing in a few smaller tomatoes: romas, cherries, etc. will also add a nice little something.)
(Sometimes I add zucchini. This time I added a can of artichokes. Seriously, whatever veggies you have in the fridge.)
2 cans of Tomato Paste (These are usually 6 oz. each. The tomato paste helps thicken up the chili.)
1T Cumin
2t Chili Powder
Salt to taste
Play with the rest of the seasonings:
-My mom usually adds a few Tablespoons brown sugar to her’s because she’s from Ohio.
-I’ve been known to add garlic, onion powder, and ground mustard. It’s all about what you’ve got on hand.
– – – – – – – – –
1. In a large skillet, cook the ground beef and drain it.
2.) To a Dutch oven or heavy-bottomed pot, add olive oil and your veggies on medium high heat.
3.) When these start to soften and the onions begin to grow translucent, add the tomatoes, tomato paste, meat, and the basic seasonings. Mix well, cover, and wait until it boils.
4.) When it begins to boil, turn the heat down to medium-low and let simmer. Adjust the seasoning a little bit at a time.
Serve with a dollop of Sour Cream and…
Addendum: February, 2014… Click here to get our cornbread recipe!
Life Lesson: Every belle should own an iron skillet
& have a cornbread recipe up her sleeve!
Kitchen Basics: Peeling Tomatoes
This week I brought in the last of our tomatoes for the year. It is bittersweet because there is nothing quite like cooking or eating a tomato you’ve grown yourself. Nonetheless, when the time comes, you’ve got to figure out what to do with all those little red fellas.
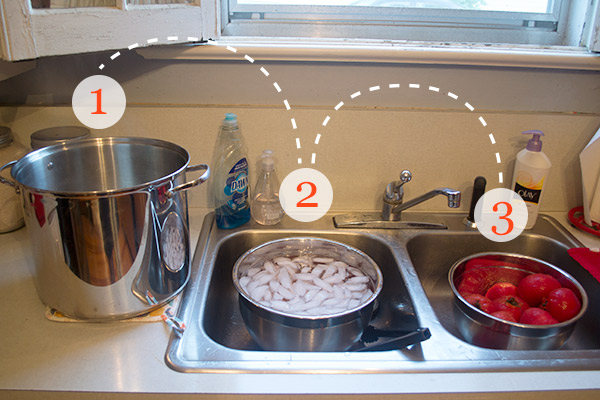
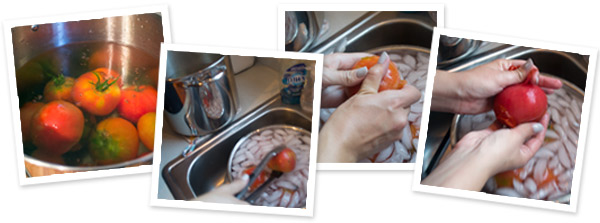
Later today, I’ll share one of my favorite end-of-the-season recipes, but for now I thought I’d share an easy step by step that will teach you how to peel tomatoes yourself. I just started peeling our tomatoes this year before cooking with them, usually in big batches on the weekends. I’ve found it helpful because whether your cook, freeze, or can them, you’ll find the peel will often detach from the fruit and become quite tough changing the texture of your dishes. So here’s what you’ll need…
1. a pot of boiling water2. a bowl of ice water
3. a bowl for your end result
If you can, set your 2 bowls in the sink. This will really help cut down on the mess.
Finally, here’s how you actually peel the little guys…
1. Bring water to a boil, and drop the tomatoes in for about 2 minutes. Boiling time will be dependent on the size of the fruit, but you’ll see the skin start to change slightly–it may even start to crack.
2. When you start to see the change, drop the tomatoes into the ice water. The cold water on the hot fruit will literally make the skin pull away from the fruit.
3. Finally, hold the fruit in both hands, peeling off the skin. See easy as pie!
*Pro Tip: If you mark the bottom of the tomato with an X, it will make it easier for the skin to loosen.
*Speaking of pie, I’ve found this also works well with peaches.
Anyway, I hope this helps! I’ll be back in a bit to share the perfect 1st-of-Fall-Last-of-the-Tomatoes recipe.
Hannah B.’s Cure for Humdrum and Ho-Hum
This summer, I spent a lot of time relieving stress by crafting.
2 Things Happened:
1.) I fell head over heels in love with spray paint.
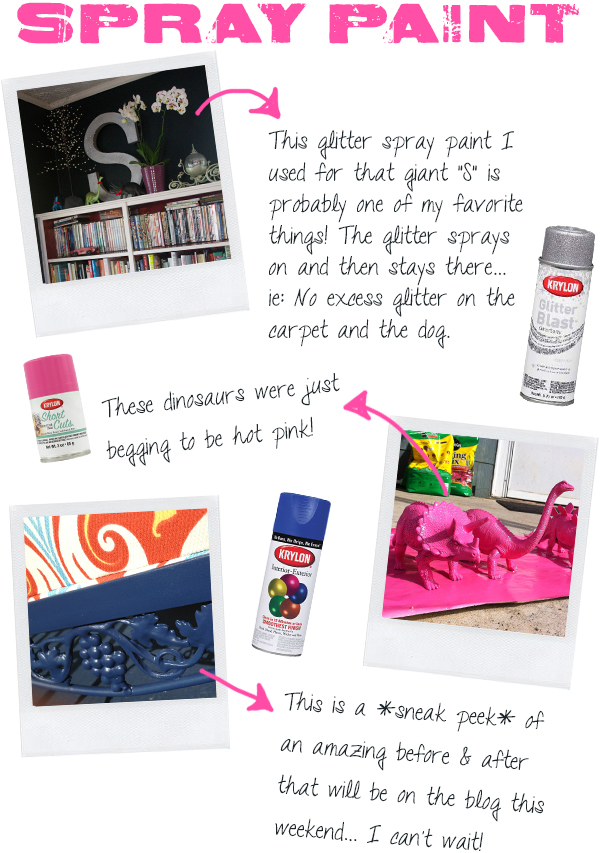
2.) I became quite a connoisseur of the stuff. (Krylon is my favorite brand at the moment.)
Spray painting is magical. It can transform anything in just a matter of minutes. Plus, Krylon’s Glitter Blast is the perfect way to get around the Glitter Ban that has been on our house since last Fall’s Pumpkin Glittering Incident.
So now I’m looking for a little inspiration. Have you done a really great project with spray paint lately? Or have you seen one on Pinterest or around the blogosphere that you’d like to try? Leave a comment below and let me know what it is!
A Little Daydreaming
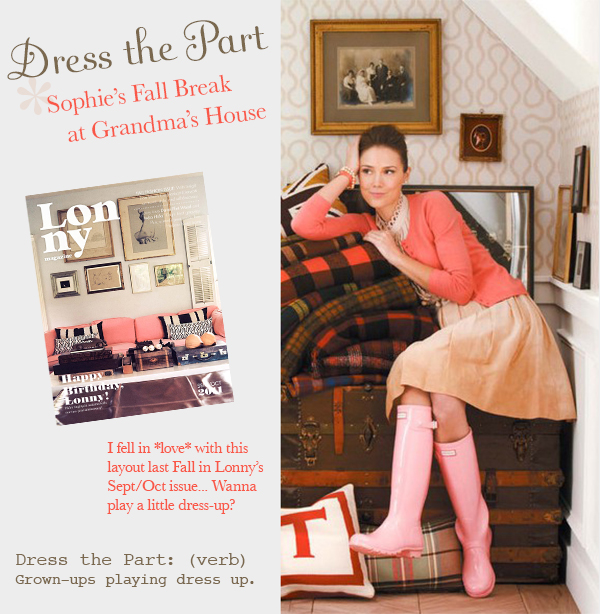
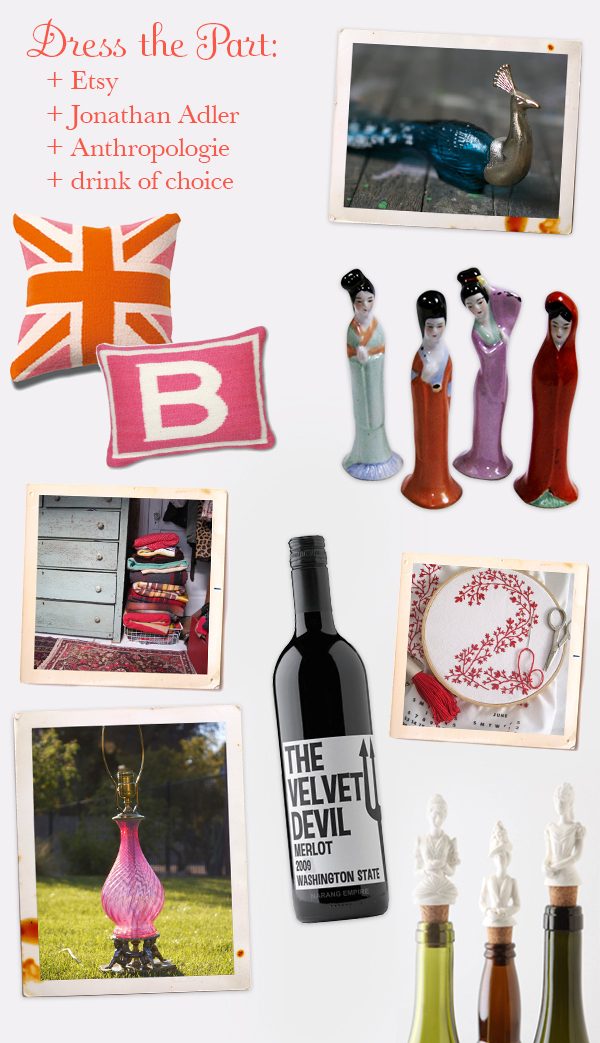
*This Dress the Part was inspired by a *lovely* layout (see p.90) in the Sept/Oct issue of Lonny Magazine.
It’s Fall Break and Sophie has snuck off to the North East to spend a weekend with her beloved grandmother. She’s packed an old trunk with just what she needs (a few books & a stylish outfit–the necessities!) in hopes that she might sneak some of grandma’s beloved treasures back home with her.
As with any stylish college girl, Sophie is never without good literature. On this trip, there are three books packed away in her chest:
Franny & Zooey : for American Lit, of course
the Capote classic Breakfast at Tiffany’s : to celebrate 50 years
and a little David Sedaris for a touch of comic relief!
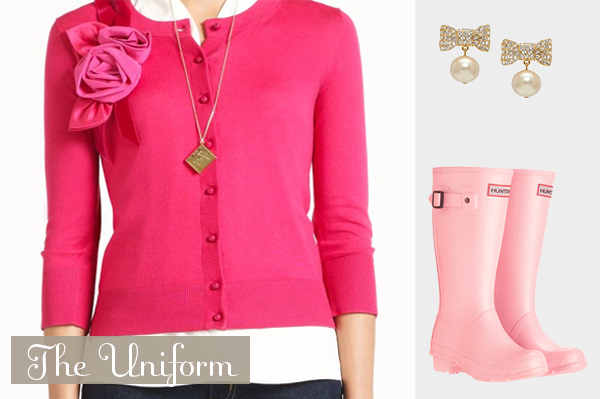
Kate Spade Cardigan & Earrings She couldn’t resist the built-in corsage and bows. // Pink Hunter Boots In case she needs to muck around in the pumpkin patch.
clockwise from the top:
Grandma was so sweet to give Sophie this old Avon peacock perfume bottle that has been on her vanity for ages. (You can get your own on Etsy, I’m sure.) // These hand-painted Japanese figures from Grandma’s trip to the Far East in the 60s will look perfect atop Sophie’s mantle. (Etsy) // Grandma taught Sophie a new stitch to practice. (She’s planning on taking a cue from Design Sponge and making her own calendar to dress-up the wall of her apartment.) // Sophie is never without a bottle of wine. Her current favorite? The Velvet Devil and, to top off the bottle, these Hofdame bottle stoppers from Anthropologie. // Sophie has been lusting after this pink lamp for more years than she’d care to count. This time, it’s finding it’s way into her chest… after all, what are the odds of Grandma going into the guest room any time soon? // Sophie couldn’t resist sneaking a few of these wool blankets into her chest for a cold winter’s night back at school. (I saw these on Etymologie last Fall.) // Every girl needs a monogrammed pillow! (these little lovelies are from Jonathan Adler)
Happy Daydreaming!
Sit & Sip: My ‘Welcome Back to Tennessee’ Cocktail
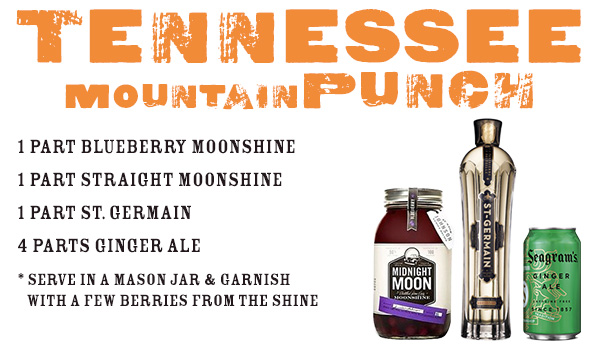
Last weekend, I hosted a Welcome Home party for my honey! (For those that don’t know, he was here all summer.) I tried to make things as ‘East Tennessee’ as possible. There were outdoor games, a galvanized tub of beer, plenty of fried chicken, and this Tennessee Mountain Punch. The recipe was an experiment at the time, and the results were super tasty! The great part? You can make as much or as little as you like!
Runway to Room: Warming Up
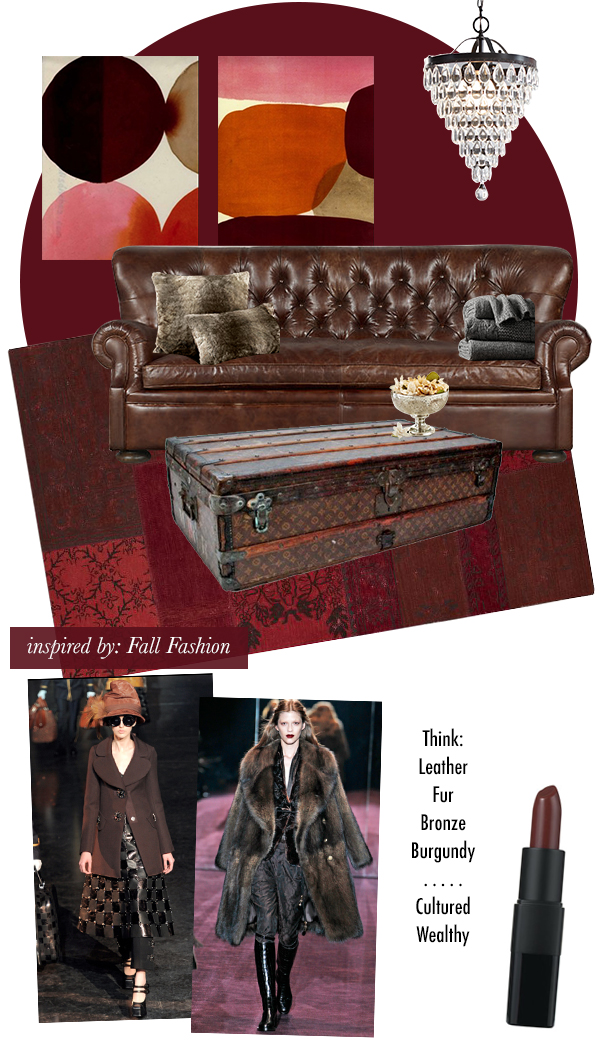
Ever since the runway shows this Spring, I have been dying to wrap myself in a fur coat and ride by train through Russia with a vintage Louis Vuitton trunk and lots of burgundy lipstick. But travel budgets being what they are, today I thought I’d look at a few ways to bring these opulent Fall looks into our homes. Feeling like you’re there is almost as good, right? Here’s what I came up with…
Inspired by:
Louis Vuitton and Gucci’s Fall ’12 RTW presentations and, of course, the burgundy lipstick that everyone seems to be falling for lately.
*As a side note, I discovered on allure’s website and is called “Belle Etoile.” Needless to say, while I am still not convinced that burgundy lipstick is ever appropriate on a pale-skinned gal like myself, I found this to be the most appropriate choice.
The Room:
Couch / Faux Mink Pillows / Alpaca Knit Throw from Restoration Hardware
Bronze Chandelier from Lowe’s
Cadiz Rug from West Elm
Mercury Glass Bowl from Pottery Barn
