The Thanksgiving Game Plan: 6 Days Out

Today, we discuss one of my very favorite parts of the holiday party season: Planning the menu. The first year we hosted Thanksgiving, I completely geeked out on the research. (Full disclosure: I have a slight obsession with buying cookbooks from the 1940s & 50s that introduced the ‘modern housewife’ to planning a menu for new-fangled nutritional needs.) All that to say, I thought I’d offer a simple set of things I’ve learned along the way from vintage cookbooks, Williams-Sonoma, and Martha Stewart. (You can also find some other favorite links and recipes on my Pinterest board: The Belle’s Thanksgiving Game Plan.)

The Cardinal Rule of Dinner Parties: Always make enough for 3 extra guests. No hostess ever regrets having too much.

Well, she may if no one shows up, but for holiday parties, guests are usually kind enough to RSVP.

Before Dinner

Have something for your guests to snack on while they chat. The traditional choice is, of course, wine & cheese. But not too much.

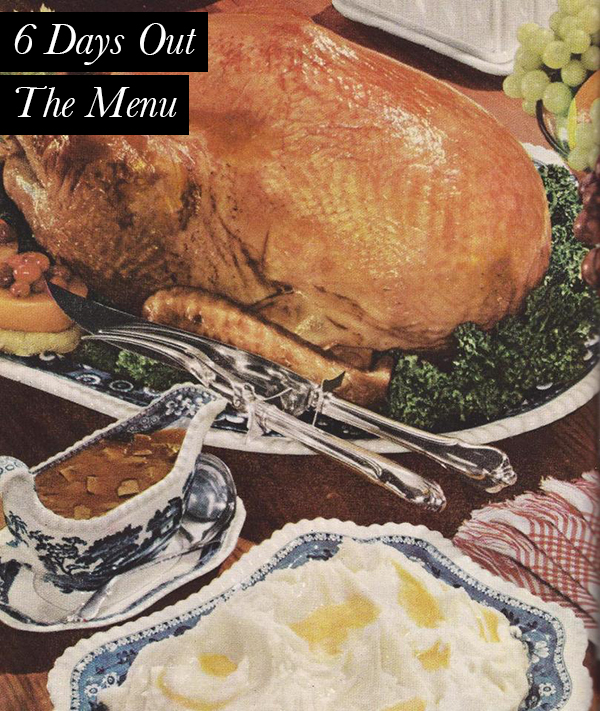
The Turkey

Portioning:

A good rule is 1.5 pounds per guest. (Of note: For smaller birds, try 2 pounds per guest. The smaller the bird, the smaller the bone to meat ratio.)

Cook Time:

It doesn’t take nearly as much time to roast a turkey as some people think.

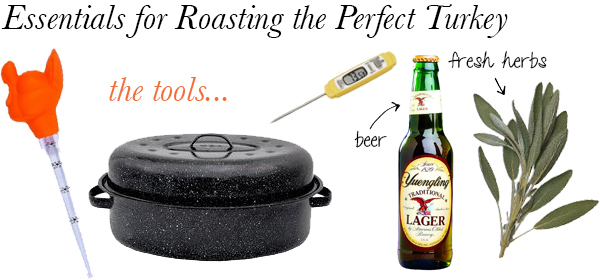
Start with the turkey, breast down, at 400°F for 45 minutes. Then, flip the bird and roast at 325°F until it your thermometer reads 180° when inserted into the deepest part of the thigh. (Be careful not to let the thermometer touch the bone.) The juices should be clear, not pink.

The basic idea is you want to seal in the juices in the beginning and then slow roast it the rest of the way.

A good estimate of cook time is: 2.5 hours for a 10 pound bird and add 15 minutes for every 2 pounds after that. (Here’s a really helpful

2 Secrets to Be Sure It Doesn’t Dry Out:

  1. Baste the bird every 15-30 minutes.
  2. Trust your meat thermometer.

A Couple Other Things:

  1. I use beer along with chicken stock to roast any poultry including turkey.
  2. I love bundling fresh herbs in cooking twine and using them when roasting the bird as well as in the stuffing.

The Sides

The Traditionals…

A Couple Others…

  • I *love* serving squash this time of year.
  • Always have 2-3 other veggies. (I know it’s unbelievable but these brussels sprouts are always a hit!)
  • My mother-in-law makes the best pretzel salad. (Think this, minus the pineapples.) I also eat it for my Thanksgiving midnight-snack and Black Friday breakfast.
  • Sides are the easiest thing to have guests bring. Just be sure you’ve made at least one or two yourself in case your guests forget. (Yes, this has happened before.)

The Desserts

2 Words: Pumpkin. Pie. (My *award-winning* recipe to follow!)

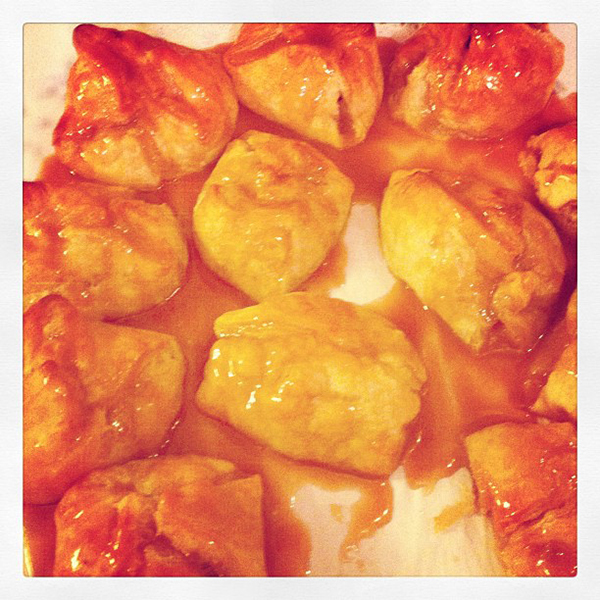
Also, might I recommend another choice for those (like Husband) that hate pumpkin. How about these little Caramel Apple Bundles?
The Thanksgiving Game Plan: 7 Days Out

Thanksgiving 7 Days Out Gather

Alright ladies, we are 7 days out from the big day. If you’re hosting for the festivities yourself and wondering what you should be doing this evening to help you get ready, I’m here to set your mind at ease. You should be Pinteresting, of course!

7 days out from any holiday party, I like to gather. Gather some visual inspiration on Pinterest, gather some new recipes, gather supplies (table linens, candles, etc.), and then, I make a ToDo List. It looks something like this…

FRIDAY

  • Finalize menu.

WEEKEND

  • Wash & iron table linens.
  • Gather, polish, & wash all dishes, flatware, stemware, and serving pieces.
  • Stock the wine rack & liquor cabinet.
  • Put together a stain remover kit.
  • Make place cards.

MONDAY

  • Grocery Shop. (best done LATE at night to avoid crowds)
  • Restock tea light & unscented candle supply.

TUESDAY

  • Buy flowers.

WEDNESDAY

  • Make a playlist.
  • Set the table.
  • Prepare the desserts.
  • Chop the veggies.

 As you might assume, tomorrow we’ll talk recipes. Until then, here’s a little bonus…
Click here to see The Belle’s Thanksgiving Pinboard!

The Thanksgiving Game Plan: 8 Days Out

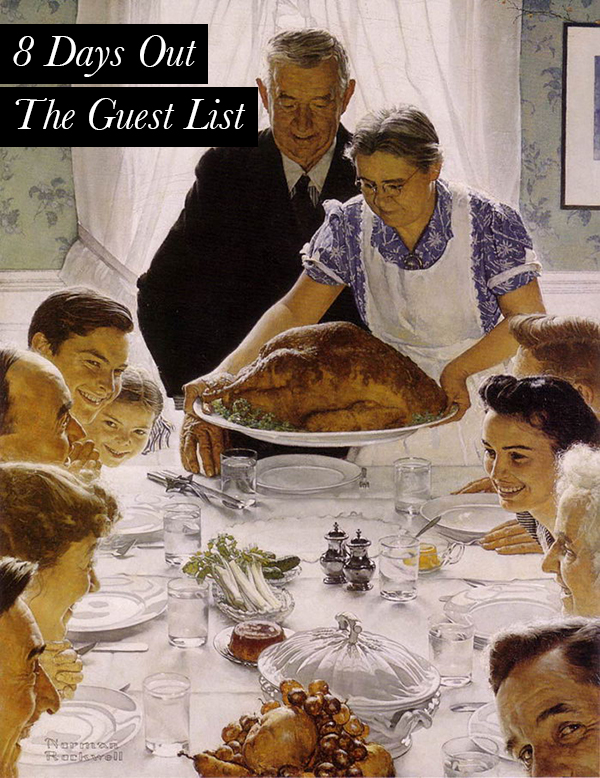
8 Days Out: The Guest List

Can you believe it? Thanksgiving is next Thursday! Are you hosting your first Thanksgiving and wondering what you should be doing today, the Wednesday before Thanksgiving, to get ready? Finalizing your guest list. Make sure you know who will be at your table and also any special needs they may have. For example, my guest list for any party usually looks like this…

Name… any special needs

Joe Schmo… peanut allergy
Bella Boo… baby (soft veggies + Cheerios)
Linda Smith
Riley C. Riley
So on… & So forth

Tomorrow, we’ll start to get the house ready!

It’s Officially Cranberry Season

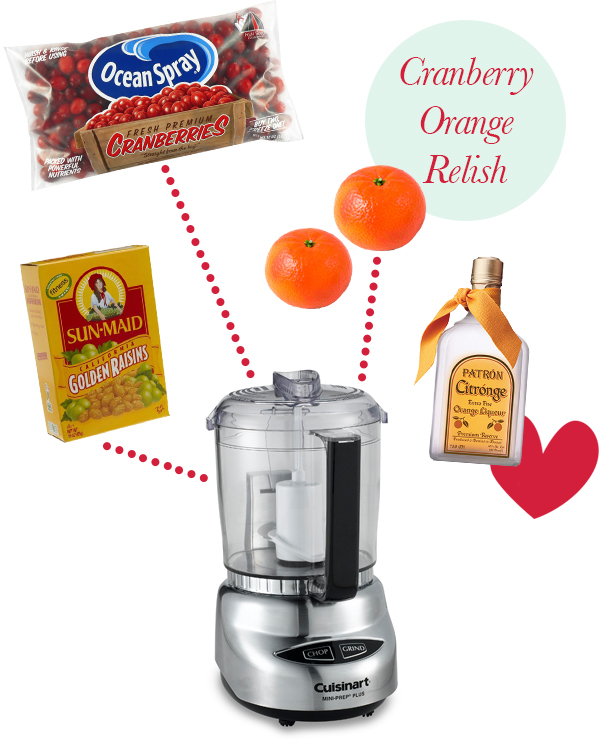
This week the time change hit the Slaughter house like a cannonball. With the days getting shorter it seems all we want to do is cook, sleep, put on Netflix, and make pretty things. So as promised, I’ll be sharing some recipes that will help us all hunker down for winter, starting with the Cranberry Orange Relish that I mentioned earlier in the week. It’s perfect for all those turkey sandwiches I’m sure we’ll all be eating during the holidays. It’s even pretty tasty to have on the side of your Thanksgiving plate as a tart little something between savory bites. Enjoy!

cranberry-orange-relish

Cranberry Orange Relish

Ingredients:
1 cup fresh cranberries
rind of 1 clementine
fruit of 2 clementines
1/4 cup golden raisins
2T Patron Citronge (or other orange liqueur)
a little bit of sugar

– – – – – – – – – –

1.) Add fruit to a food processor/blender and chop fine. You can serve it on your table like this or…

2.) For more of a condiment, for sandwiches and stuff, add the mixture to a heavy-bottomed saucepan with the liqueur and cook until it turns bright red. Add sugar if it needs a little sweetening up.

Store in a jar and refrigerate for up to 2 weeks.

Halloween Candy: Bourbon Apple Bundles with Caramel Sauce

Disclaimer: These may be a little messy for trick-or-treating, but they are the perfect thing to calm you down if you are trying to spend a leisurely evening at home and those sugar-hopped kids won’t stop banging on your door asking for handouts.

On Saturday night, we threw a dinner party, which had several fabulous outcomes. First, we invited some of our very favorite people so we had a great time drinking, eating, and eventually playing music, which seems to be how most of our dinner parties come to a close… at 2am.

Second, I made up this dessert that may or may not be my new favorite thing. Oh, and I topped them with my first *ever* batch of caramel… I’m pretty positive I can make magic now just in case you were wondering.

Bourbon Apple Bundles with Caramel  Sauce

Ingredients:
2 green apples
1 box Pepperidge Farm puff pastry sheets
1/3 C light brown sugar
1/4 C all-purpose flour
1/4 C bourbon of choice (When cooking, I always use Jack Daniels.)
1 tsp cinnamon
*chopped nuts to top if you like

– – – – – – – – – –

1.) Preheat your oven to 400° and thaw your pastry.

2.) Peel 2 apples. Thinly slice them and then cut them into 1/2 inch pieces.

3.) Mix together brown sugar, flour, bourbon, & cinnamon with your apples.

4.) Cut your puff pastry sheets into 9 square pieces.

5.) Use a small spoon to put a bit of the apple mixture in the middle of each square.

6.) Stretch the pastry a bit and bring together opposite corners. You want the apples sealed into the pastry as much as possible.

7.) Lay out bundles on a baking sheet or baking stone that has been covered in parchment and sprayed with Pam.

8.) Bake until the puff pastry is a golden brown.

9.) Drizzle with Ree Drummond’s (aka The Pioneer Woman) caramel sauce. *

10.) Top with chopped nuts if you choose, but remember who you’re serving. There are so many allergies now!

*A small note on the caramel, after everything was mixed & melted I brought the caramel to a boil and continued whisking. This helped thicken the sauce. I only boiled it until it started to thicken and then I cut it off.

Also, to make drizzling a lot easier, I put the sauce in a little creamer pitcher. It looked adorable, worked perfectly, and then was easy to store. When I used the caramel sauce again yesterday, I just heated the pitcher in the microwave which was just long enough to soften the caramel but not long enough to make the pitcher hot.


Halloween Candy: Little Ghosts

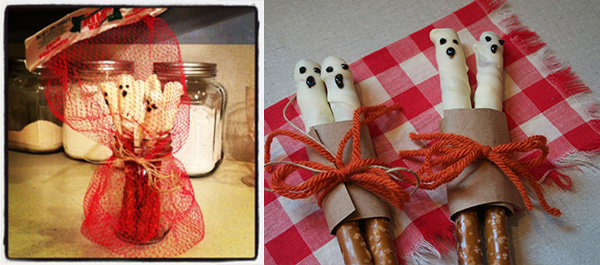
Looking for another alternative to those expensive bags of store-bought candy? This one is simple and yummy! I first saw these little guys on pinterest, and I just had to try them. I used the large pretzel sticks, one and a quarter cup white chocolate chips and 2 teaspoons shortening. I slowly (slow is key) melted the chocolate, adding the shortening a little bit at a time. (The shortening is what thins the chocolate enough to dip the pretzels smoothly.) After letting the chocolate cool and set, it’s time to add the faces. I used black icing but on pinterest I saw that you could use mini chocolate chips if you’d like.

I also found it super fun to package these little guys. For a party, I used a little mason jar, fruit netting and twine. Then, for a couple of friends, craft paper and orange yarn.

– – – – – – – – – – – –

Although, I should probably warn you there is one serious side effect of this craft. I will be singing this song all weekend…

I miss the White Stripes. [ sadface ]

Halloween Candy: Cookies

Who said you don’t get presents at Halloween? Here you go, my gift to you…

These cookies are going to make you friends.

There, I said it.

I hate to go all Dale Carnegie on you first thing on a Saturday morning, but if you really want to ‘win friends and influence people,’ you’d better learn to bake. And if you can bake cookies like these, you may never be lonely again.

…Unless, of course, you choose to bake them and then eat them alone watching Addams Family reruns, which I happen to think would be quite festive of you. Que sera…

The recipe can be found on Joy Cho’s blog by clicking here. 

Now here’s what I do…

I bake the cookies following the recipe on Joy’s blog and then separate them into 2 groups.

On one group goes melted white chocolate.

On the other group goes a mixture of peanut butter with just a little powdered sugar to give it more body.

Finally, I put a marshmallow on the ones with white chocolate and stick them in a warm oven to soften up.

Squish the little sandwiches together and there you have it! I believe Joy said she’d also tried salted caramel with it, which I have not. However, I can assure you, no matter how you make them, they’re sure to be a hit!

Recipe: Chili & Cornbread

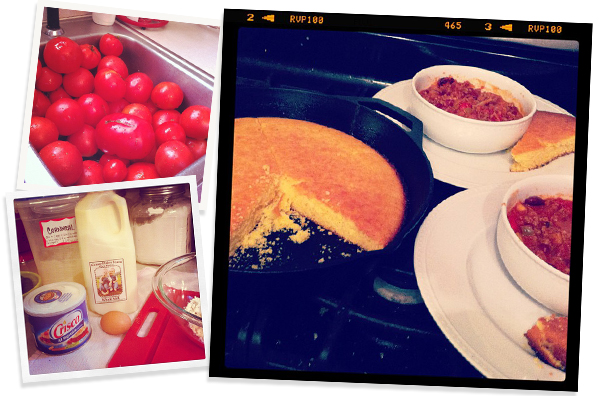
Well, I promised to share my favorite ‘Last of the Tomatoes’ recipe and here it is: Chili & Cornbread. It’s the best for the last of the tomatoes for 2 reasons. First, by the end of the season, the tomatoes are no longer at their peak flavor so cooking really brings out their best. Second, it’s Fall! There’s a nip in the air, why wouldn’t you want chili & cornbread?

Chili is also a really handy thing to have in your cooking repertoire simply because it is easy to have simmering on the stove on Saturday or Sunday when you want to clean out the produce drawers. You can pretty much throw any number of veggies into chili, and they will taste awesome as long as you have the basic seasonings in there. Here’s my basic recipe…

Hannah B’s Basic Chili

Ingredients:

1lb. Ground Beef

1 Onion (medium in size; yellow, white, red, it doesn’t matter.)

2 Bell Peppers (For this particular pot I had green, yellow, & red leftover halves from another dish… sometimes I just use green. Each color you choose will affect your flavor but, again, you really can’t go wrong.)

2-3 Jalapenos or Poblano Peppers (Basically just a pepper to give it a rounder little kick.) 

Tomatoes (Whatever you’ve got, chop them up and throw ’em in. If I am buying fresh tomatoes from the market to use, I’ll usually buy 5 or 6. Throwing in a few smaller tomatoes: romas, cherries, etc. will also add a nice little something.)

(Sometimes I add zucchini. This time I added a can of artichokes. Seriously, whatever veggies you have in the fridge.)

2 cans of Tomato Paste (These are usually 6 oz. each. The tomato paste helps thicken up the chili.)

1T Cumin

2t Chili Powder

Salt to taste

Play with the rest of the seasonings:
-My mom usually adds a few Tablespoons brown sugar to her’s because she’s from Ohio.
-I’ve been known to add garlic, onion powder, and ground mustard. It’s all about what you’ve got on hand.

– – – – – – – – –

1. In a large skillet, cook the ground beef and drain it.

2.) To a Dutch oven or heavy-bottomed pot, add olive oil and your veggies on medium high heat.

3.) When these start to soften and the onions begin to grow translucent, add the tomatoes, tomato paste, meat, and the basic seasonings. Mix well, cover, and wait until it boils.

4.) When it begins to boil, turn the heat down to medium-low and let simmer. Adjust the seasoning a little bit at a time.

Serve with a dollop of Sour Cream and…

Addendum: February, 2014… Click here to get our cornbread recipe! 

Life Lesson: Every belle should own an iron skillet
& have a cornbread recipe up her sleeve!

Sit & Sip: My ‘Welcome Back to Tennessee’ Cocktail

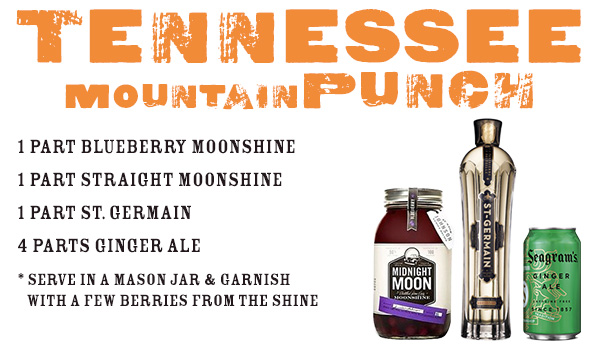
Last weekend, I hosted a Welcome Home party for my honey! (For those that don’t know, he was here all summer.) I tried to make things as ‘East Tennessee’ as possible. There were outdoor games, a galvanized tub of beer, plenty of fried chicken, and this Tennessee Mountain Punch. The recipe was an experiment at the time, and the results were super tasty! The great part? You can make as much or as little as you like!

Cocktails: Thin Man Style

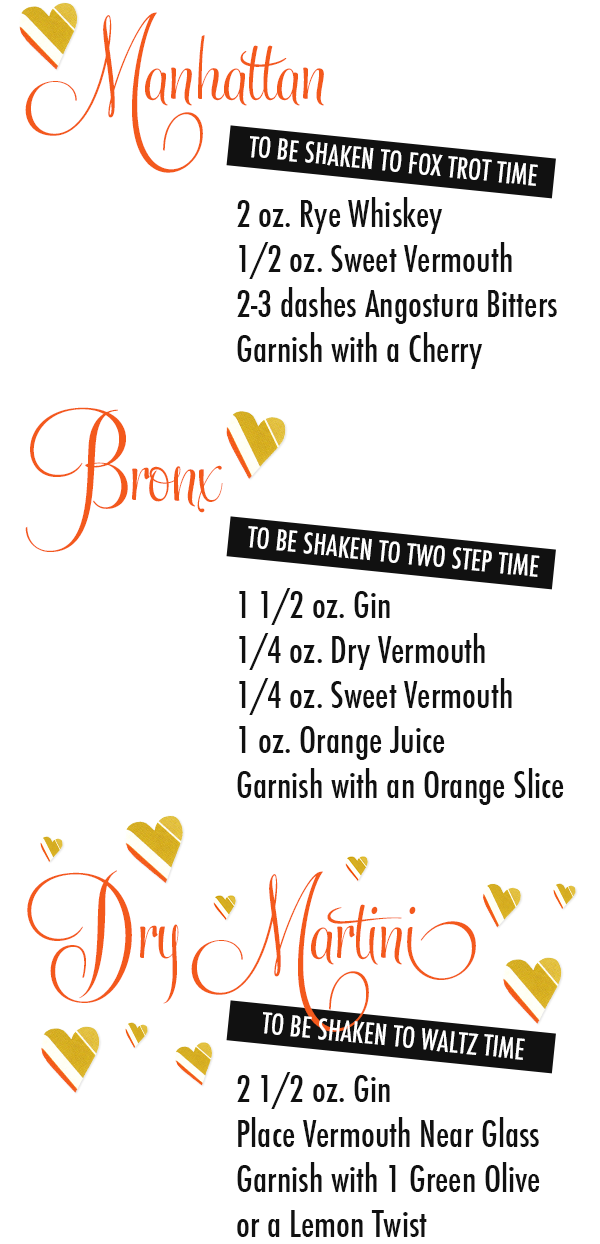
Most days I feel as if I’m living in a Thin Man movie… beautiful clothes, martinis, and a witty husband & loveable terrier that always keep things entertaining.

Life is what you make it! So for your midweek touch of glamour, I thought I’d share a few cocktail recipes. Now if only our lives called for more evening gowns and silk!