Our Christmas Gallery Wall

picture collage display close-up

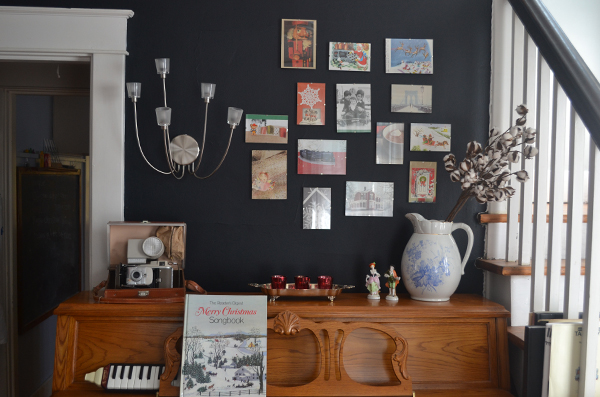
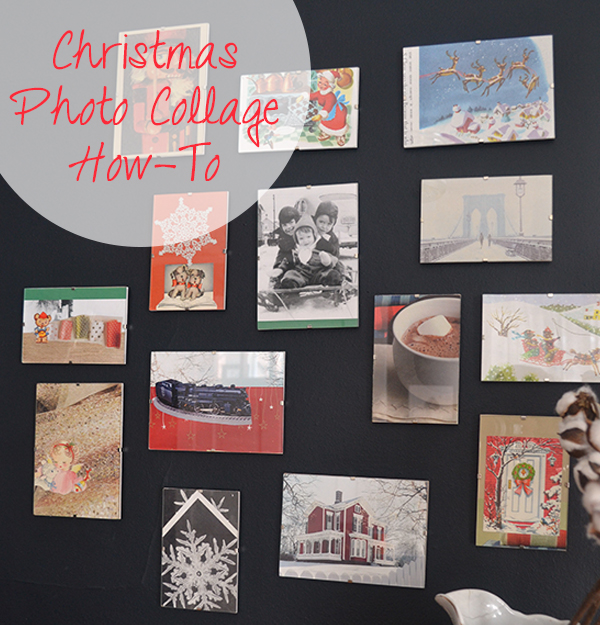
Confession: We bought our 1st house 6 years ago and, until recently, had virtually nothing hanging on the walls. I don’t know why. I love interior design, but when it comes to our own home, it’s been so much harder to get things done. I think it’s the perfectionist in me that is nervous things won’t turn out perfectly. But recently I made a goal to stop putting things off. So this weekend, I bit the bullet and put up the frames that had been sitting on my desk for over a year. I still haven’t decided just what photos to put in them (we hardly ever print any out) so in the meantime, I’ve made this Christmas gallery wall. It turned out to be a lot easier than I’d expected.

framing

Step 1: I cut a piece of butcher paper to the size of the space where I wanted to hang the pictures.

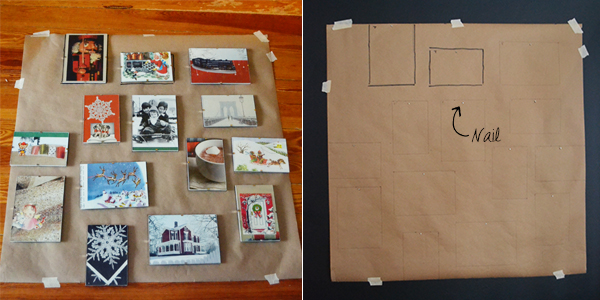
Step 2: I laid out all the frames out in a random way and moved them around until they were just right. Then, I used a ruler to make sure things lined up correctly.

*Tip: Get 2 different sizes of frames to mix it up a bit. I had 6 5×7 frames and 8 4×6 frames. 

Step 3: I traced the frames onto the butcher paper and then made a dot 1/4 inch into the box where the nail would need to be.

Step 4: Hang the butcher paper in place with masking or painter’s tape. Then, place the nails where you put the dots. After that, you can just gently remove the paper and leave the nails behind.

scraps collage frame

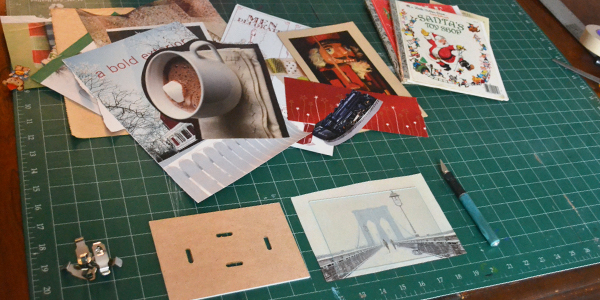
Step 5: I gathered a bunch of Christmas-y images from magazines, cards, wrapping paper, and old books. Then, I cut them to size using the glass of the frame and the XActo. I used a single image for some and for a few I made collages.

Step 6: Finally, I put the frames back together with the artwork inside and hung them on the wall.

picture collage display

What do you think? Do you ever hang seasonal artwork in your home?
An Easy Garland How-To

As I mentioned on Friday, every house should have a handmade garland this time of year when we are all forced to spend a bit more time indoors. It just makes walking in the door on those chilly, dreary days a bit more festive. So I thought I would share the one that I made for our home this week. It’s hanging in our living room and, I must admit, I want one there all the time now.

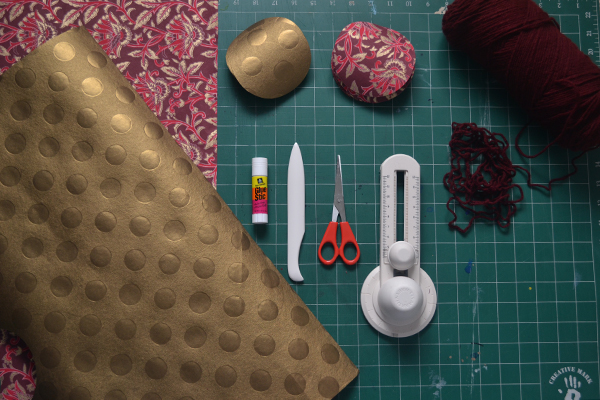
What You’ll Need…
– I am 100% obsessed with my Martha Stewart circle cutter and love finding any excuse to use it. (However, scissors with a traced, round object would also work but may take a little longer.)
– Scissors
– Bone Folder
– Decorative Paper or Wrapping Paper
– Glue Stick
– Yarn

1.) Measure the space where you’d like to hang the garland and cut a length of yarn accordingly.

2.) Cut out circles. I used 4 inch circles and cut out about 40. I ended up having some extra, but I’m the type that would always rather have too many rather than going back to cut out more.

folding circles

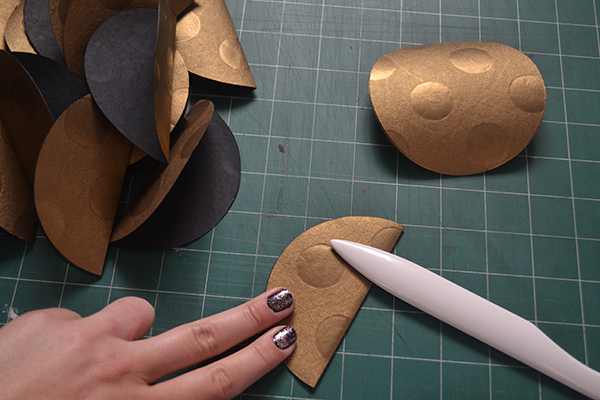
3.) Fold your circles in half, and use a bone folder to make a smooth crease.

Add glue and yarn in crease

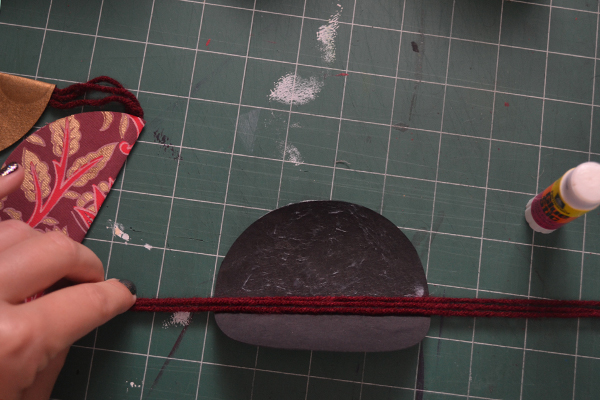
4.) Put glue on one half of the circle and lay your yarn right in the crease.

fold paper over yarn and itself

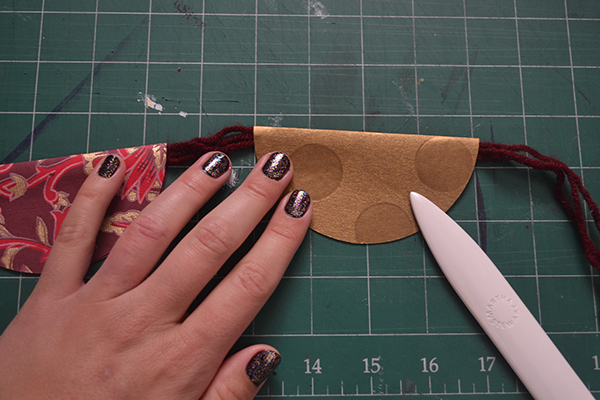
5.) Fold the circle over the yarn on to itself. Use a bone folder to smooth out any wrinkles.

hanging garland, flower

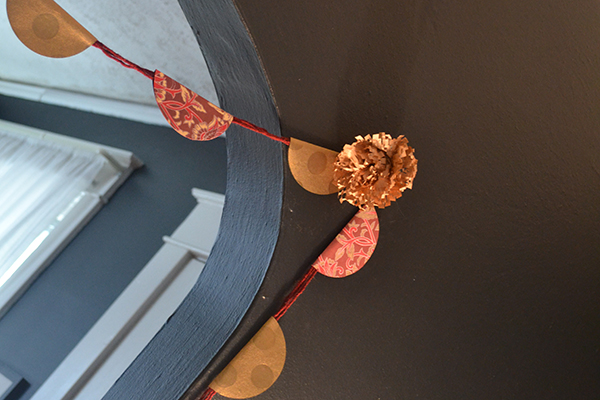
6.) When the garland is done, you may want to make something that will cover the place where you attach the garland to the wall. In this case, I made a few flowers out of that craft paper with slits that many places use as a shipping material now.

Hang and voila!


Cozy Up Your Home with “The Holiday”

I will be the first to admit that there are some movies you watch solely for the eye candy… The ProposalIt’s Complicated, anything Diane Keaton has ever made (with the exception of The Godfather & Father of the Bride), and, of course, The Holiday. Admit it, while Jude Law is pretty darn adorable in that little sheet tent with twinkle lights, the movie itself really isn’t all that fantastic. But that house? To die for! So as the temperatures drop, I’ve been brainstorming ways to cozy up our own little home, and I thought it only appropriate to share my notes.

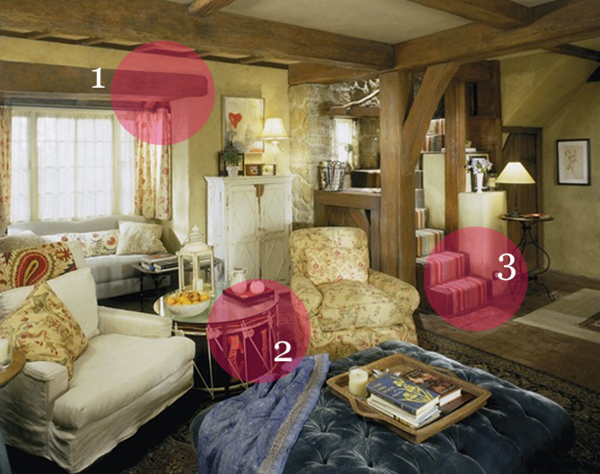
1. Every English cottage should have at least one velvet, over-stuffed ottoman.  It’s a foot rest, it’s a place to set your tray of tea and crumpets, plus it is extra seating for guests.

2. Blankets, Blankets everywhere. Blankets here and blankets there. It’s a cottage, which means that, at a moment’s notice, you should be able to drop everything and curl up under a blanket with tea and a good book.

3. Scent is so very important in any home. I especially love this old trick of fruit pricked with cloves. It’s also something to do when you have busy hands and don’t want to do anything that requires too much thought.

1. I just adore this metal apron on a deep sink. Along with the big knobs and tall counters, cabinets and cart, this kitchen acts as a perfect study of contrasts in big and small. I think bringing large things into a small space like this makes for a fun, whimsical, comfortable style.

2. Every cottage should have a handmade garland. (Tutorial to follow this weekend.)

3. Every home (anywhere) should always have tea kettle on the stove. Not only does it humidify the air in the winter, but it also is great in case you have unexpected guests.

1. If you are lucky enough to have a home with good bones, show them off.

2. I love eclectic touches in a classic home. This drum topped with a mirror makes for the perfect, quirky little side table.

3. In a cold, English cottage there should be lots of rugs thrown about to add texture and warm things up. This striped stair runner is a perfect way to make sure that texture connects the 2 floors and that your toes stay warm as you walk up to bed!

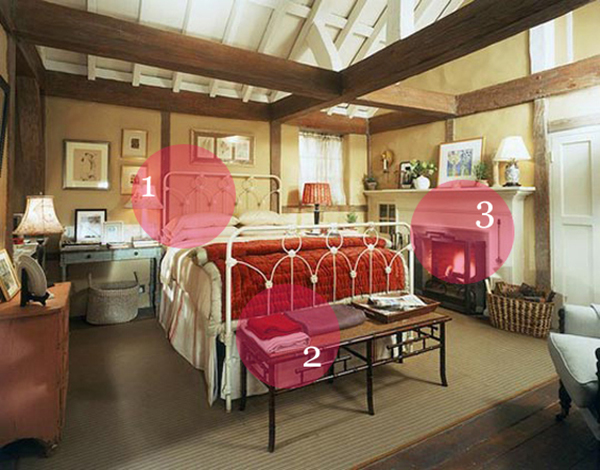
1. A classic white iron bed will make any room seem cozier.

2. Blankets & Throws & Quilts, oh my!

3. To add to the coziness and that warm snuggly feeling, one must have a fireplace in the bedroom. And, of course…

Who wouldn't want to soak in this tub?

Picking an Exterior Palette

Yesterday, I shared the Before & After of our recent paint job. Today, I wanted to share with you just how we got there.

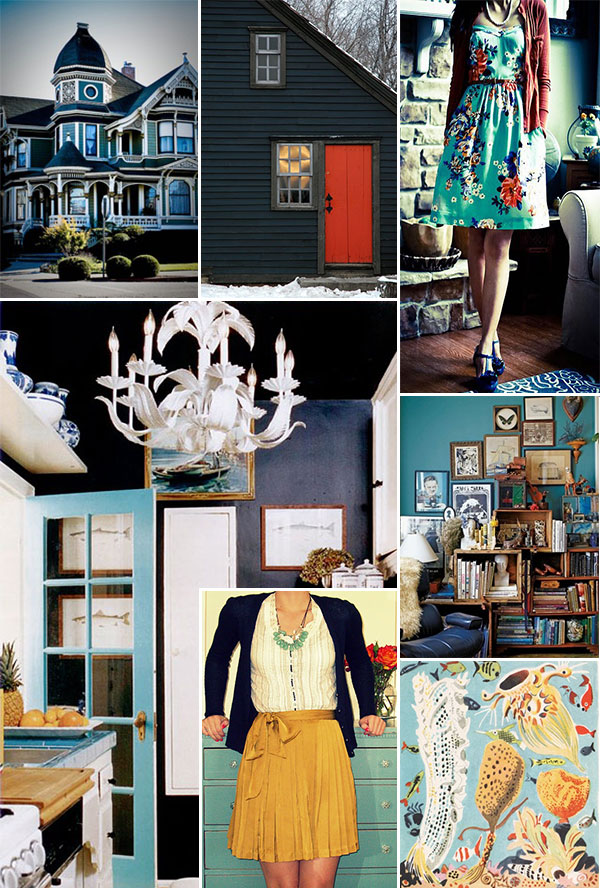
Picking a color palette, especially one that is such a bear to get done as well as quite costly like your exterior paint, should not be taken lightly. However, I am also a firm believer in ‘just going for it.’ What’s the worst thing that could happen? If you are going with your gut, the odds are that whatever colors you choose will be great. Here’s how I like to go about choosing a palette.

First, I go to Pinterest. I look through all the images that speak to me at that moment and see if I can spot any similarities. Above is a collage of some of the pictures that were really singing when I was choosing the palette for our home.

Next, I go to the paint store and start looking. Live with the paint chips for a while. Carry them around in your bag. Get them out and mix them up. Odds are, after a couple of days, you will be looking at the same few every time you get them out. When you find a few that work, I highly suggest trying them out online. In the world of computerized everything, each paint brand has a way to “try on” their colors. We chose these 3 from Sherwin Williams.

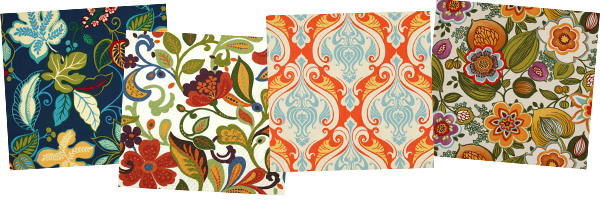
Finally, look at accent fabrics. For this step, go back to your original set of pictures. What are the accent colors that are repeated in several photographs. Then, start sorting fabrics by what type of fabric you need (in this case we needed Indoor/Outdoor fabric.) and colors.

I chose the 4 fabrics you see above on Fabric.com, and then let Husband make the final decision. If you have a significant other, this is a great step to do together. To be honest, the fabric he chose was just one I’d thrown in the mix. It seemed a bit much for me at first, but now I am completely in love! Significant others have a way of seeing things that you may not even know you like, but you’ll be surprised at how much this stretches you!

Finally, don’t be scared! Try something new. If you don’t want to start with your whole house, maybe you just need some encouragement to liven up that old guest room. A little fabric and a fresh coat of paint can totally change your outlook. Just take my word for it!

It’s Like Having a Brand New House!

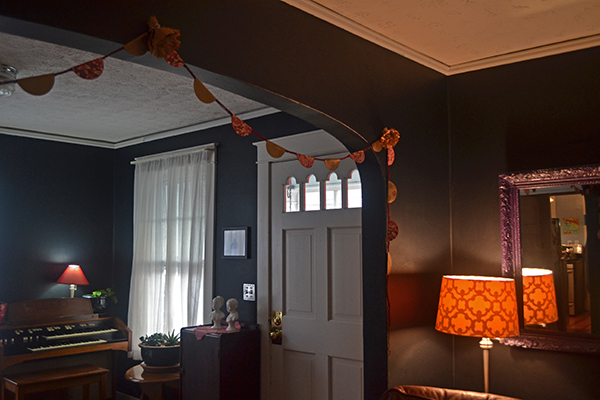
We moved into our house 6 years ago, and I’m pretty sure it has needed a paint job for at least 15. In the sun, it had faded to a pretty funky ombre… and, trust me, ombre is not nearly as stylish on a house as it is on your hair. So several weeks ago we were finally able to get it painted, and now it feels like an entirely new house. What do you think?

Please note the 2 small pumpkins on the front steps… I found them growing in our backyard!

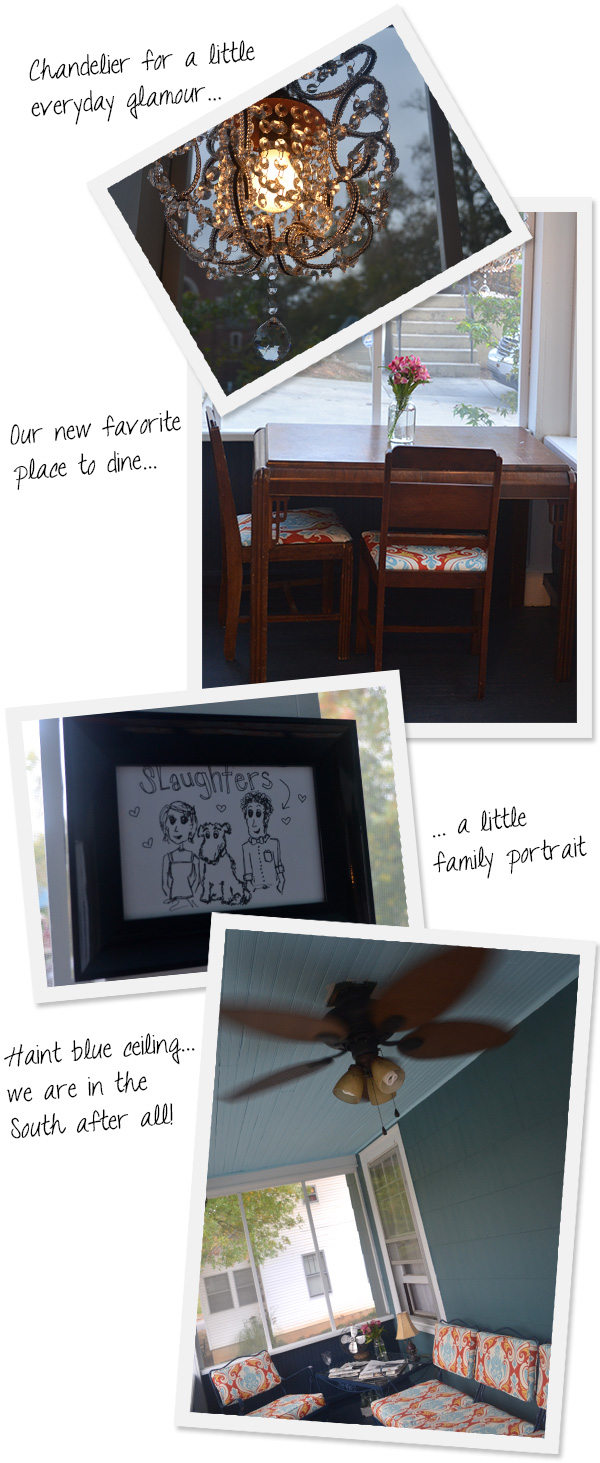
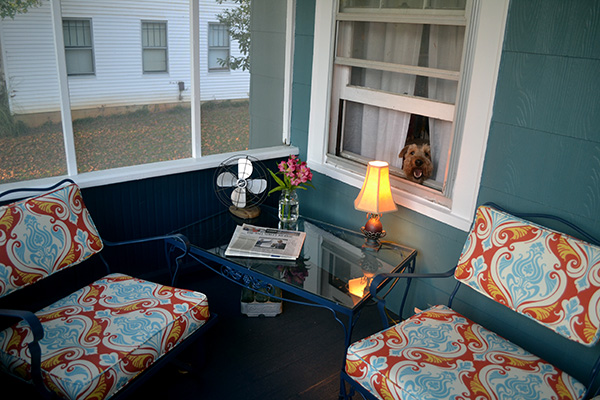
We also made some seriously fab upgrades to the front porch including new screen, new fixtures, some upgrades to the furniture, new cushions, and a great table & chairs Husband thrifted at a local yard sale.  We’ve been spending so much time out there, it’s like adding a new room to our home! There’s nothing better than sipping a bourbon and hearing jazz drift through open windows out onto the porch. A few of the details…

Tomorrow I’ll share how we picked the paint palette and the fabric. What about you? Any last minute upgrades you’re making to the outside of your house before hunkering down for winter?

Runway to Room: Warming Up

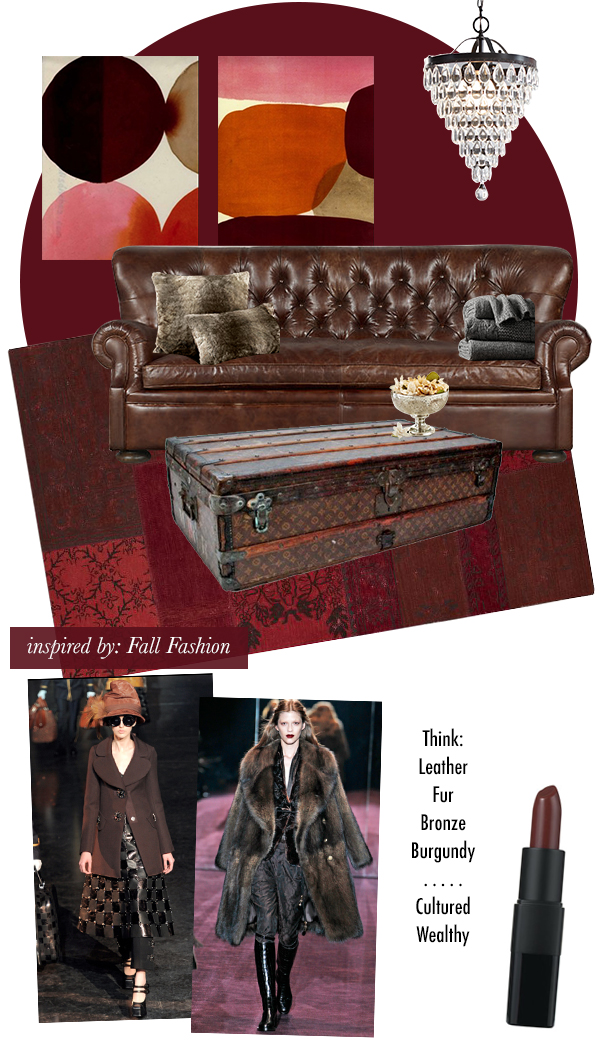
Ever since the runway shows this Spring, I have been dying to wrap myself in a fur coat and ride by train through Russia with a vintage Louis Vuitton trunk and lots of burgundy lipstick. But travel budgets being what they are, today I thought I’d look at a few ways to bring these opulent Fall looks into our homes. Feeling like you’re there is almost as good, right? Here’s what I came up with…

Inspired by:

Louis Vuitton and Gucci’s Fall ’12 RTW presentations and, of course, the burgundy lipstick that everyone seems to be falling for lately.

*As a side note, I discovered on allure’s website and is called “Belle Etoile.” Needless to say, while I am still not convinced that burgundy lipstick is ever appropriate on a pale-skinned gal like myself, I found this to be the most appropriate choice.

The Room:

Couch / Faux Mink Pillows / Alpaca Knit Throw from Restoration Hardware

Art by Luli Sanchez

Bronze Chandelier from Lowe’s

Cadiz Rug from West Elm

Mercury Glass Bowl from Pottery Barn