The Sewing Party

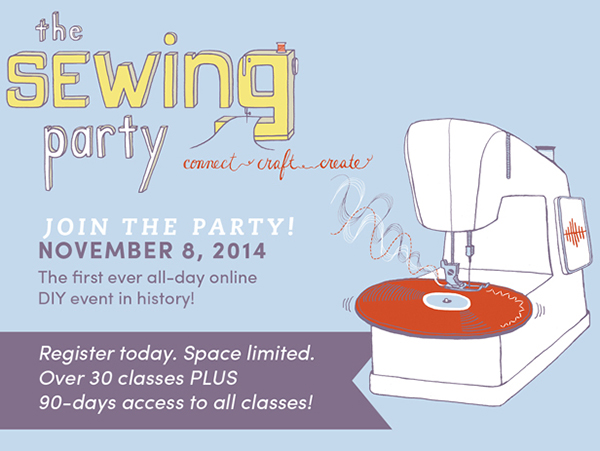
This Saturday, November 8th, fellow Made + Remader Lish Dorset and I are stoked to be apart of the first ever online all-day DIY event in history: The Sewing Party! It is the perfect time of year to settle down for the cold winter months and brush up on your domestic goddess skillz. (Yes, I said skillz.) Plus, who doesn’t like to make new internet friends, right?

There’s something for every skill level, so even if you’re just dipping your toes in there’s something for you. Registration is $40 for the chats and 30+ classes. (For those that need repetition to learn a new skill, the class access lasts for 90 days.) And bonus: Lish and I will be hosting live-chats in The Sewing Party Lounge. Here are the deetz

12 – 1 pm*: Lish Dorset will be Busting Scrap and Stash – Put your stash of fabric and scraps to work!

1 – 2 pm: Lish will help you Re-energize Your Sewing with inspirational tips and guidance for finding that next amazing project.

2 – 3 pm: Hannah Slaughter will be discussing ideas to Repurpose Your Relics.

* Times are EST.

Click here to get the full schedule of classes and chats.

The Sewing Party

Here are a few of the classes I’ll be checking out:

Bra Making with Madalynne

Becoming an Etsy Entrepreneur with Etsy’s Graham Ashcraft

10 Patternmaking Skills Every Fashion Forward Sewer Needs to Know with Denise Wild

Sewing Machine Basics with Singer’s own Becky Hanson

If you plan on attending, RSVP to the party, and then hit me up on Twitter with #TheSewingParty.


Tales of a Crafty Hoarder

Words from Husband tonight: “I threw out three jars the other day, but I didn’t tell you. But I love you, and you didn’t miss them.” Le sigh.

Hello, my name is Hannah,
and I am a crafty (find better word for “hoarder”)

My favorite thing to hoard of late? Jars. No, I don’t know why. There’s the giant button jar

Confessions of a Crafty Hoarder | Hannah & Husband

The jars from the Made + Remade mantle I did for Joann at Christmas…

Confessions of a Crafty Hoarder | Hannah & Husband

The jars from our pantry redo–although, I completely blame Husband for those. And the other night, I threw together a cute little candle holder with a jam jar, a handful of grits and some washi tape.

Confessions of a Crafty Hoarder | Hannah & Husband

Note: Cute succulent washi tape was a gift. It’s part of a new line by Smarty Pants Paper Co. that I’m currently obsessed with.

It’s not always jars though. I go through phases. At one point is was felt. Then, it was old clothes. I have an odd assortment of fuzzy mini pom-poms for no particular reason. And this past Christmas I noticed myself repeatedly buying tinsel for some reason… (I really like things that sparkle!)

But I suppose the real problem comes when remnants from each phase stick around and have to be organized into some semblance of order in my studio.

Confessions of a Crafty Hoarder | Hannah & Husband

Around the holidays I posted this Instagram of a drawer in my studio just to see if anyone else had this problem. Newsflash:

My favorite people also hoard craft supplies.

Let’s face it: crafty hoarders are totally the ones you want around in a crisis.
Need a last minute party thrown? Call a crafty hoarder.
Outgrown your outfit for the pride parade and need more sequins? Call a crafty hoarder.
Want a monogram put on that cute new sweater set? Call a crafty hoarder.
Don’t have any mini dinosaurs to put in your terrarium? Call a crafty hoarder.

So, in the comments below, tell us…

What do you hoard?


Coaster Set How-To

Dear Spring,

Where are you?! Yes, I know we were sipping cocktails on the porch yesterday, and (at the moment) the sun is shining. But, the weatherman says it’s supposed to be 20° on Wednesday, and so I implore you: why do you insist on being such a fickle lady?

Le sigh.

So while Spring is being a bit too elusive outside, I’ve decided to Spring-up the inside, which includes adding yellow to as many things as possible this week in hopes of coaxing the sunshine to come our way.

Coaster Set How-To | Hannah & Husband

First up: these cute coasters…

Coaster Set How-To | Hannah & Husband

With a t-square I marked 4×4 inch squares on a 12×12 cork board. (You can find these at the craft store and they’re usually sold in 2-4 packs.)

Coaster Set How-To | Hannah & Husband

Then, with a craft knife, I cut out the squares.

Coaster Set How-To | Hannah & Husband

Next came the fun part. Using painters tape of different sizes, I marked out various patterns on the cork squares.

On a related note: I have gotten addicted to this Martha Stewart Patterning Tape. I originally used it to customize the tea cups for the HGTV Handmade shoot last fall and have found numerous uses since then.

Coaster Set How-To | Hannah & Husband

2 coats of spray paint…

Coaster Set How-To | Hannah & Husband

Allowing them to dry completely between coats and before removing tape, of course.

Coaster Set How-To | Hannah & Husband


Make My New Necklace Hanger

necklace-hanger

A couple weeks ago, Husband redid my closet (because he’s the best), and I decided that if my clothes were getting a stylish new home, my jewelry should too. So I went to Lowe’s–not quite sure what I was looking for. I ended up finding these beautiful pre-cut corbels in the aisle with the banisters and trim so I nabbed ’em!

Here are the other supplies:

  • a bit of paint & a brush
  • drill
  • screw hooks
  • set of picture hangers
  • hammer

01-necklace-supplies

I also got a sample of Pantone paint and applied two coats.

02-necklace-paint

Next, I drilled holes for the hooks.

Note: Be sure that your drill bit is set short enough that it won’t go all the way through the wood. Husband helped me with this part, and I was pretty excited to conquer some serious fear of the drill.

03-necklace-drill

Next, grab the hammer. Before you attach the picture hangers to the back, be sure you’re working on a soft surface. You don’t want to scratch up your paint job.

04-necklace-hanger

Then, just screw in your screw hooks, and hang it up.

05-necklace-hooks

If you have an old house like we do, you live in constant fear of the plaster cracking.

Here’s a little tip (again thanks to Husband): Place a piece of painter’s tape over on the spot before you start hammering in your nail. Then, just pull it off before you hang things up.

06-necklace-tip

Now there’s nothing left to do but hang up your necklaces.

07-necklace-hang


Making My Own Stationery

make your own stationery, supplies

As I’ve said before, I really love mail. Sending mail. Getting mail. I love it all. So a few weeks ago, when I ran out of stationery, I decided to make something a little more personal than just buying it at a shop like I usually do. Here’s what I did.

First, I went to the craft store and bought 2 sets of blank stationery–one craft and one white. They come in large packs so there will be plenty to experiment with. Next, I took apart one of the envelopes, and used the inside to make a template from cardboard with my ruler and an X-acto. Use the one solid side (where the address goes) and cut just under the glue of the flap.

Next, I traced the template on the random scrap papers I’d collected and cut it out with scissors.

make your own stationery, envelope liner

make your own stationery, envelope liner step 2

After placing the new liner inside the envelope and straightening it, I gently folded the flap down. Finally, I used a glue stick to attach the new liner to the inside of the top. You don’t have to worry about gluing the bottom half because it will stay in place by itself.

make your own stationery

Finally, after lining all of the envelopes, I decorated the cards with stamps and scraps.

make your own stationery

And voila! My new stationery…

make your own stationery

Now, to the writing…

DIY’s Great Wreath Rivalry

Alright readers, it’s competition time! Recently, I had the unique opportunity of doing a couple How-To’s for DIYNetwork.com’s Great Wreath Rivalry. Now, by simply *pinning* one of the 12 How-To’s on the site, you can be entered to win COLD HARD CASH.

Click Here to Start Pinning Wreaths. 

If you just want to see my How-To’s:

(This one is not part of the comp but still super cute.)

Click here to see how to make my wreath with vintage children’s book illustrations.

and then…

(This one you should pin… lots.)

Click here to get the super simple instructions for this card display wreath.

Hannah B.’s Cure for Humdrum and Ho-Hum

This summer, I spent a lot of time relieving stress by crafting.

2 Things Happened:
1.) I fell head over heels in love with spray paint.
2.) I became quite a connoisseur of the stuff. (Krylon is my favorite brand at the moment.)


A few of my favorite projects.


Spray painting is magical. It can transform anything in just a matter of minutes. Plus, Krylon’s Glitter Blast is the perfect way to get around the Glitter Ban that has been on our house since last Fall’s Pumpkin Glittering Incident.

So now I’m looking for a little inspiration. Have you done a really great project with spray paint lately? Or have you seen one on Pinterest or around the blogosphere that you’d like to try? Leave a comment below and let me know what it is!