Jingle Bells for Your Front Door

Jingle Bells for Your Front Door | Hannah & Husband

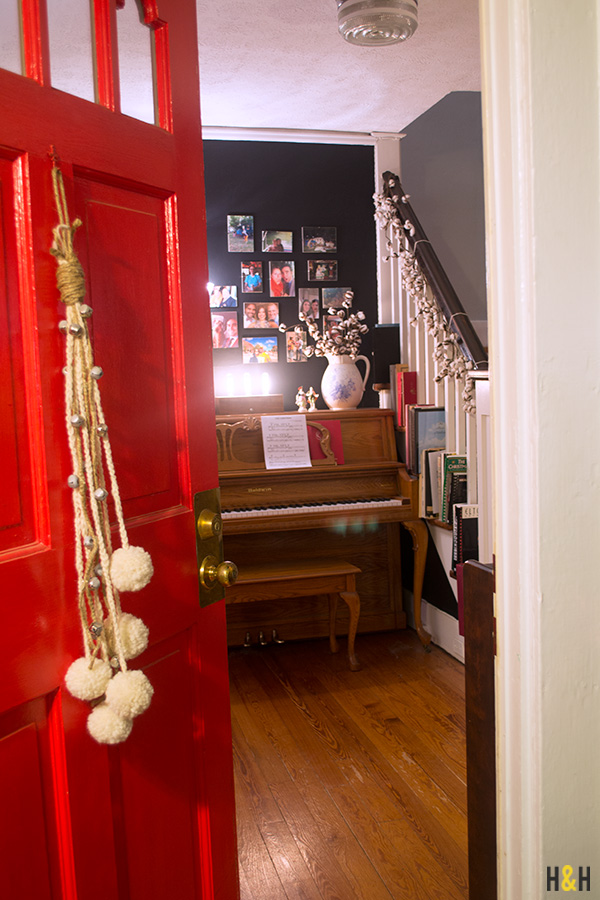
For one reason or another, I have a newfound obsession with jingle bells. I was cleaning out my studio the other day when I found a jar of full of them, and I couldn’t resist. I decided to make a little winter door decoration perfect for the flurry of guests that come & go during the season.

Here’s what I did…

Jingle Bells for Your Front Door | Hannah & Husband


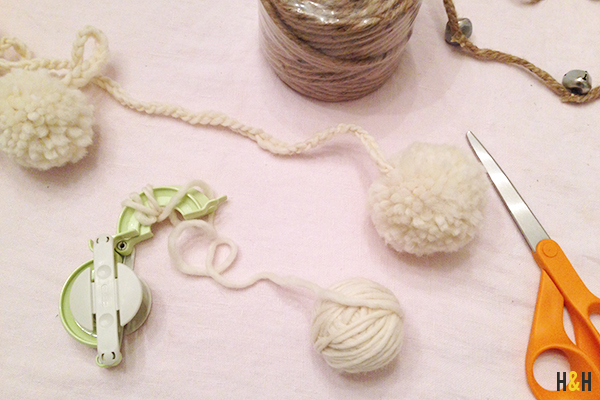
First, I crocheted five strands with a chunky cream yarn. Then, I made some fluffy pom-poms and tied them on to the ends.


Jingle Bells for Your Front Door | Hannah & Husband


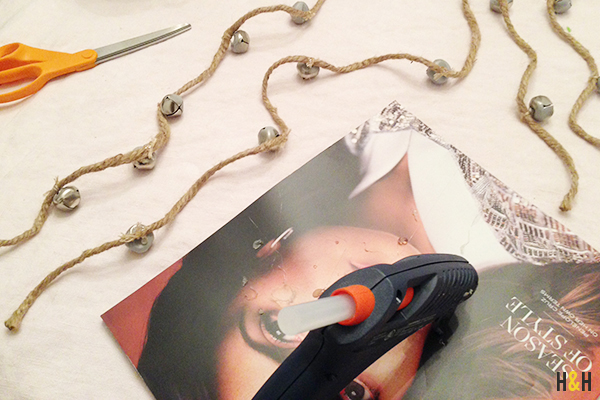
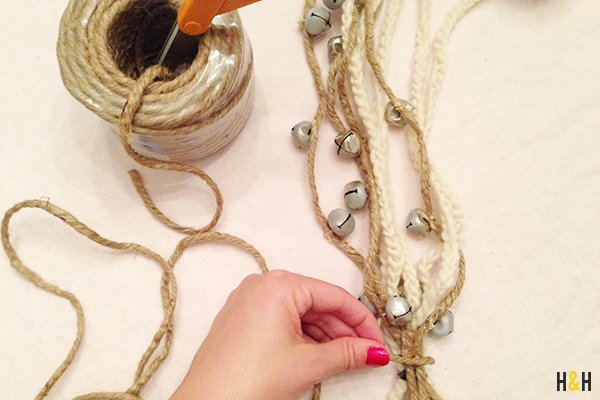
Next, I tied jingle bells onto some jute rope (also found in my studio), and reinforced the thread I used to tie them on with some hot glue. You could do this step several different ways; this just worked best for the things I had on hand.

Jingle Bells for Your Front Door | Hannah & Husband


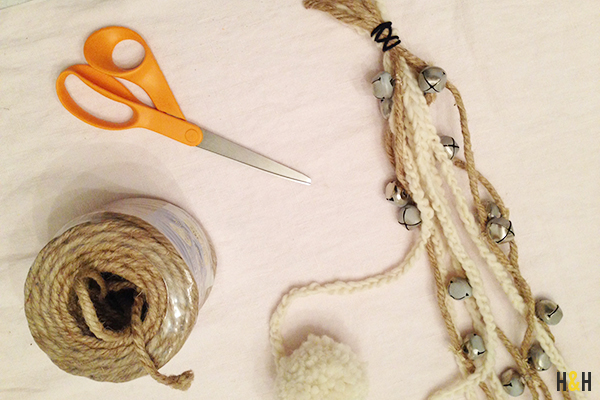
Laying out all the strands to the desired hanging lengths, I tied all the ropes together with a hair band at the top.

Jingle Bells for Your Front Door | Hannah & Husband


Next, I made a loop out of the jute rope for hanging.

Jingle Bells for Your Front Door | Hannah & Husband


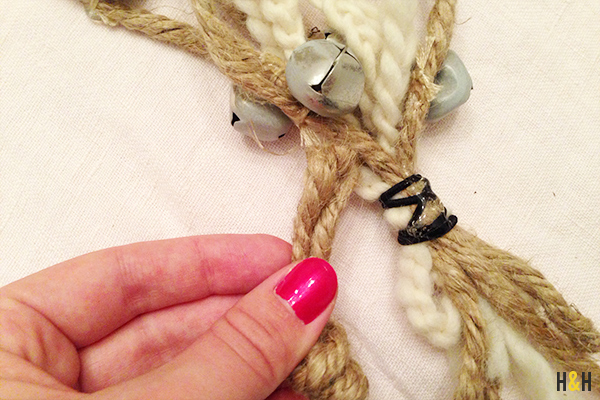
With hot glue, I attached the base of the loop to the hair band.

Jingle Bells for Your Front Door | Hannah & Husband

Finally, I used hot glue and repeatedly wrapped the jute rope around to secure the top.


Thanksgiving Decoration: Turkey in the Straw

Turkey in the Straw DIY | Thanksgiving Decor by Hannah & Husband

Several years ago my mom picked up this fun little turkey. Every year she would buy an oversize pumpkin for Halloween, and then come November she would add the turkey to the pumpkin. This year as she pulled the feathers and head out of storage a couple of the dowel rods were broken, so she asked me to do a little turkey surgery. After I fixed hers I stuck them in a straw bale on our front porch. Voilà: Turkey in the Straw.

Turkey in the Straw How-To | Hannah & Husband

Click here to listen to Turkey in the Straw for a little inspiration while you work.

Before she came to take the turkey back, we decided it would be fun to have one of our own. We cut the shapes out of a scrap of 3/4″ plywood using a jigsaw (for a more permanent turkey use solid wood and be sure to waterproof it), and Hannah painted them to the colors of her choosing. Take a look at our process, and download the templates to create your own!

Turkey in the Straw How-To | Hannah & Husband

Turkey in the Straw How-To | Hannah & Husband

Turkey in the Straw How-To | Hannah & Husband

Looking for more Thanksgiving inspiration? Click here.