Halloween Candy: Bourbon Apple Bundles with Caramel Sauce

Disclaimer: These may be a little messy for trick-or-treating, but they are the perfect thing to calm you down if you are trying to spend a leisurely evening at home and those sugar-hopped kids won’t stop banging on your door asking for handouts.

On Saturday night, we threw a dinner party, which had several fabulous outcomes. First, we invited some of our very favorite people so we had a great time drinking, eating, and eventually playing music, which seems to be how most of our dinner parties come to a close… at 2am.

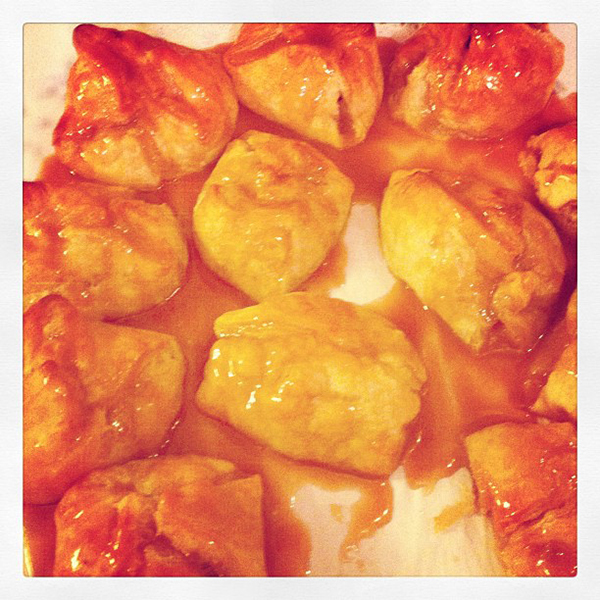
Second, I made up this dessert that may or may not be my new favorite thing. Oh, and I topped them with my first *ever* batch of caramel… I’m pretty positive I can make magic now just in case you were wondering.

Bourbon Apple Bundles with Caramel  Sauce

Ingredients:
2 green apples
1 box Pepperidge Farm puff pastry sheets
1/3 C light brown sugar
1/4 C all-purpose flour
1/4 C bourbon of choice (When cooking, I always use Jack Daniels.)
1 tsp cinnamon
*chopped nuts to top if you like

– – – – – – – – – –

1.) Preheat your oven to 400° and thaw your pastry.

2.) Peel 2 apples. Thinly slice them and then cut them into 1/2 inch pieces.

3.) Mix together brown sugar, flour, bourbon, & cinnamon with your apples.

4.) Cut your puff pastry sheets into 9 square pieces.

5.) Use a small spoon to put a bit of the apple mixture in the middle of each square.

6.) Stretch the pastry a bit and bring together opposite corners. You want the apples sealed into the pastry as much as possible.

7.) Lay out bundles on a baking sheet or baking stone that has been covered in parchment and sprayed with Pam.

8.) Bake until the puff pastry is a golden brown.

9.) Drizzle with Ree Drummond’s (aka The Pioneer Woman) caramel sauce. *

10.) Top with chopped nuts if you choose, but remember who you’re serving. There are so many allergies now!

*A small note on the caramel, after everything was mixed & melted I brought the caramel to a boil and continued whisking. This helped thicken the sauce. I only boiled it until it started to thicken and then I cut it off.

Also, to make drizzling a lot easier, I put the sauce in a little creamer pitcher. It looked adorable, worked perfectly, and then was easy to store. When I used the caramel sauce again yesterday, I just heated the pitcher in the microwave which was just long enough to soften the caramel but not long enough to make the pitcher hot.
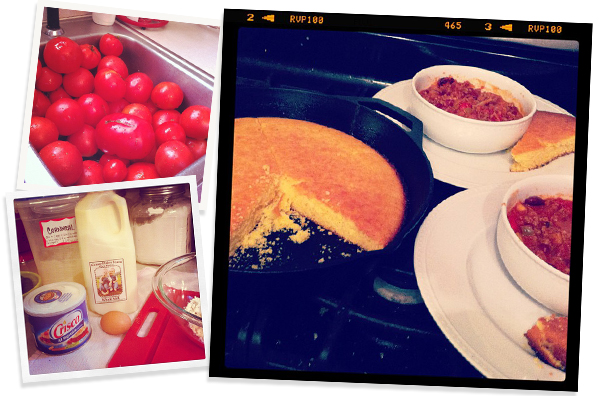
 

Recipe: Chili & Cornbread

Well, I promised to share my favorite ‘Last of the Tomatoes’ recipe and here it is: Chili & Cornbread. It’s the best for the last of the tomatoes for 2 reasons. First, by the end of the season, the tomatoes are no longer at their peak flavor so cooking really brings out their best. Second, it’s Fall! There’s a nip in the air, why wouldn’t you want chili & cornbread?

Chili is also a really handy thing to have in your cooking repertoire simply because it is easy to have simmering on the stove on Saturday or Sunday when you want to clean out the produce drawers. You can pretty much throw any number of veggies into chili, and they will taste awesome as long as you have the basic seasonings in there. Here’s my basic recipe…

Hannah B’s Basic Chili

Ingredients:

1lb. Ground Beef

1 Onion (medium in size; yellow, white, red, it doesn’t matter.)

2 Bell Peppers (For this particular pot I had green, yellow, & red leftover halves from another dish… sometimes I just use green. Each color you choose will affect your flavor but, again, you really can’t go wrong.)

2-3 Jalapenos or Poblano Peppers (Basically just a pepper to give it a rounder little kick.) 

Tomatoes (Whatever you’ve got, chop them up and throw ’em in. If I am buying fresh tomatoes from the market to use, I’ll usually buy 5 or 6. Throwing in a few smaller tomatoes: romas, cherries, etc. will also add a nice little something.)

(Sometimes I add zucchini. This time I added a can of artichokes. Seriously, whatever veggies you have in the fridge.)

2 cans of Tomato Paste (These are usually 6 oz. each. The tomato paste helps thicken up the chili.)

1T Cumin

2t Chili Powder

Salt to taste

Play with the rest of the seasonings:
-My mom usually adds a few Tablespoons brown sugar to her’s because she’s from Ohio.
-I’ve been known to add garlic, onion powder, and ground mustard. It’s all about what you’ve got on hand.

– – – – – – – – –

1. In a large skillet, cook the ground beef and drain it.

2.) To a Dutch oven or heavy-bottomed pot, add olive oil and your veggies on medium high heat.

3.) When these start to soften and the onions begin to grow translucent, add the tomatoes, tomato paste, meat, and the basic seasonings. Mix well, cover, and wait until it boils.

4.) When it begins to boil, turn the heat down to medium-low and let simmer. Adjust the seasoning a little bit at a time.

Serve with a dollop of Sour Cream and…

Addendum: February, 2014… Click here to get our cornbread recipe! 

Life Lesson: Every belle should own an iron skillet
& have a cornbread recipe up her sleeve!

Kitchen Basics: Peeling Tomatoes

This week I brought in the last of our tomatoes for the year. It is bittersweet because there is nothing quite like cooking or eating a tomato you’ve grown yourself. Nonetheless, when the time comes, you’ve got to figure out what to do with all those little red fellas.

Later today, I’ll share one of my favorite end-of-the-season recipes, but for now I thought I’d share an easy step by step that will teach you how to peel tomatoes yourself. I just started peeling our tomatoes this year before cooking with them, usually in big batches on the weekends. I’ve found it helpful because whether your cook, freeze, or can them, you’ll find the peel will often detach from the fruit and become quite tough changing the texture of your dishes. So here’s what you’ll need…

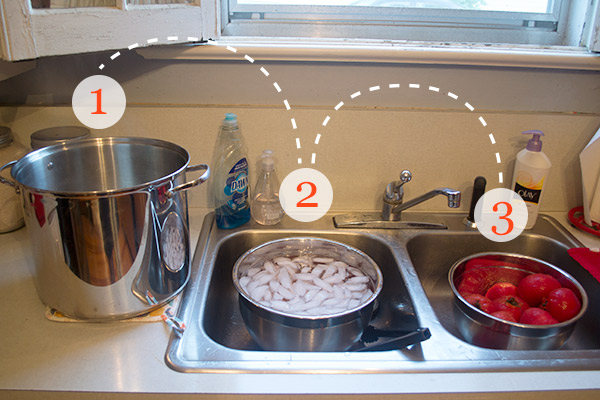
1. a pot of boiling water
2. a bowl of ice water
3. a bowl for your end result

If you can, set your 2 bowls in the sink. This will really help cut down on the mess.

Finally, here’s how you actually peel the little guys…

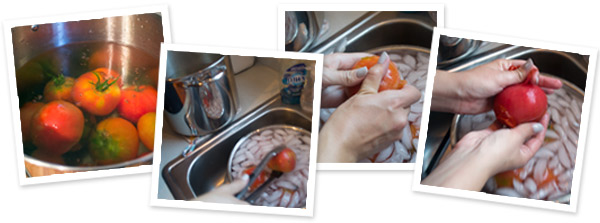
1. Bring water to a boil, and drop the tomatoes in for about 2 minutes. Boiling time will be dependent on the size of the fruit, but you’ll see the skin start to change slightly–it may even start to crack.

2. When you start to see the change, drop the tomatoes into the ice water. The cold water on the hot fruit will literally make the skin pull away from the fruit.

3. Finally, hold the fruit in both hands, peeling off the skin. See easy as pie!

*Pro Tip: If you mark the bottom of the tomato with an X, it will make it easier for the skin to loosen.

*Speaking of pie, I’ve found this also works well with peaches.

Anyway, I hope this helps! I’ll be back in a bit to share the perfect 1st-of-Fall-Last-of-the-Tomatoes recipe.

Getting ready for the Weekend

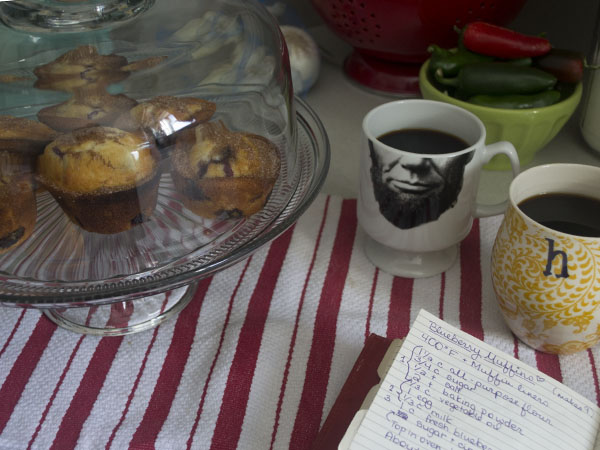
If there’s one way to ensure a perfect start to your weekend, it’s to get all the right pieces in place the night before. Husband and I like to start our Saturday mornings slowly–lying on the couch, reading, sipping coffee, listening to NPR. So often, on Friday nights, I’ll make these muffins and get the coffee maker ready so that all we have to do is make our plates and relax. As a bonus, they smell absolutely delicious and happen to make just enough that you can eat one on Friday for a midnight snack if you’re so inclined.

Blueberry Muffins

1 1/2 c All-Purpose Flour
3/4 c Sugar
1/2 tsp Salt
2 tsp Baking Powder

1/3 c Vegetable Oil
1 egg
1/3 c milk
1/3 c Greek Yogurt *

1 1/4 c fresh blueberries

Cinnamon + Sugar **

Directions: 

  • Preheat over to 400°F and grease a muffin tin. This recipe should make 10 muffins.
  • Mix together dry ingredients. Then, mix together your wet ingredients to make a nice batter.
  • Fold in the fresh blueberries.
  • Use an ice cream scoop to scoop mixture into muffin tin.
  • Bake for 18 minutes.
  • Pull out and top with cinnamon + sugar.
  • Put back into the oven and bake for another 3 minutes.

– – – – –

The dairy products in this recipe can be played with quite a bit without losing the muffin’s perfect texture… It all depends on what you’ve got in your fridge. I’ve used a bit of sour cream, heavy cream, and I’m sure buttermilk would add a lovely little dimension.

** We always have cinnamon + sugar mixture in an airtight container to use on muffins, on toast, in drinks, etc. Just another thing to make your life a little easier!